Fedexer’s Anonymous Guide 503
How to Earn the Accolades and Navigate Around City of Heroes
In Only 10000 Words or Your Money Back
Initially created by HK and Void, fleshed out by Theo
With Assistance from Pyro, Sin, Veritas, DarkNis, and Tart
Still in Active Development - 2026June
- Make Instruct-Waypoints.jpg
- Instruct-Oro.jpg
Shortcuts
If you’ve already run through this enough that you just need pointers rather than the full guide, then follow this link to the shorthand scripts click here.
Shortcut to the Labyrinth Guide here.
Check Pocket D if needed for instructions on how to change your alignment.
Check Night Ward if needed for how to get the badge to let get into Cimerora.
Why The Accolades Are Worth Earning
The Four Core Accolades
The accolades within this guide help a toon’s playability in game by directly, and permanently, increasing that toon’s maximum endurance and health. In doing so, this also boosts endurance recovery and health regeneration. The regen buff isn’t huge, but the MaxHP helps in letting you survive for long enough for help to get to you. The recovery buff can be enough to for a toon to cross the threshold from “has to dial back power usage in longer fights to manage endurance” to “don’t have to worry about endurance except in special situations.”
This might seem abstract, but having enough blue bar to use a fireball that finishes off all the minions in a kill-box can bring the tank from “slowly losing the fight” to “I can handle this”, and that tank may now have enough endurance to run another armor toggle to reduce incoming damage and focus more on taunting, and now support squishies can focus on buffing and debuffing rather than running around to avoid loose aggro.
The accolades in this guide will be referred to by their blue-side names, even if you’ll end getting them red-side.
| Accolade Name and Color Identifier | Accolade Effects |
|---|---|
| +5 Max Endurance | |
| +5% Max Health | |
| +10% Max Health | |
| +5 Max Endurance and +5% Max Health |
 Do it and you’ll be more awesomer!
The Additional Accolades
There are two more accolades that enhance your passive stats like the four “core” accolades - Conqueror of the Labyrinth, and Mazebreaker. These two accolades are related to the labyrinth, and required the use of Draught of the Fog inspirations to be active. With that in mind, those will be explained in the Labyrinth guide rather than this document.
There are 12 more accolades that each grant their own temp powers. Covering all of them here would involve a lot more work on both our parts, so this document will only account for the accolades that grant broadly useful temp powers. Even then, the primary guide is focused on the four core accolades and filling out the Long Range Teleport selection list. Accommodations for the other accolades consist of picking up specific exploration, history, and achievement badges along the way that don’t add significantly to the time required to get those four primary accolades. Finishing off the secondary accolades can be accomplished by following the appendix at the end of this guide.
| Accolade Name and Color Identifier | Accolade Power/Effect |
|---|---|
| +5 Max Endurance and +5% Max Health in Labyrinth or with Draught | |
| +5 Max Endurance in Labyrinth or with Draught | |
| Eye of the Magus - +30% Res and +50% Def to all but Psi for 1 minute | |
| Between Realities | Mark and Recall - can mark a spot and then teleport yourself back to that spot at will. Good for teleporting hostages back to the door in missions |
| Crey CBX-9 Pistol - Moderate ranged cold damage along with immobilize, -speed, and -recharge | |
| Geas - Self +100% Rech, +800% Rec, +25% ToHit, -10% Def for 1 minute | |
| Self + Mag 15 Mez and Mag 7.5 Knock protection for 30s | |
| VG Medal - Self +100% mez duration for 1 minute | |
| Elusive Mind - +25% Psi Defense, +7.5% Psi Res for 1 minute |
Why Long Range Teleport Matters (and SG Portal, and LFG, etc.)
Getting yourself around the city quickly isn’t just more fun - it’s important to be able to meet/keep up with team members without slowing them down, respond to messages in /LFG requesting help with monsters, etc.

Besides, there’s major internet points awarded to the first one that gets to the mission, right?
How to Use This Guide
This guide lays out the the best process (as far as a balance between speed, ease, and completeness) that we are aware of to get the four core accolades, fill out your Long Range Teleport (LRT) list, and open up the Mortimer Kal Strike Force while becoming familiar with the LFG and Supergroup (SG) ways of transporting around the city.
This works best with a team of 3-4 people, but the benefit of a team is mostly just in cycling the Base/Oro Portal (BP and Oro, respectively) powers and increased spawn sizes for the kill badges without spawning AVs rather than EBs. The method is quite feasible to run either solo or in large teams. If you’re running as part of a team, try to all use the same supergroup base every time.
Items required for the four accolades will be tagged alike to aid searching, along with links to the next step relevant to that specific accolade:
Example: Pocket D
| Accolade Name and Color Identifier | Search Term | First Step Specific to Accolade | Shortcut to Finishing the Accolade |
|---|---|---|---|
| AccAM-1 | – | ||
| AccTFC-1 | – | ||
| AccFP-1 | – | ||
| AccPJ-1 | – | ||
| AccArch-1 | Appendix 4 | ||
| Between Realities | AccMark | AccMark-1 | Appendix 6 |
| AccCrey-1 | Appendix 7 | ||
| AccGeas-1 | Appendix 3 | ||
| AccWill-1 | Appendix 2 | ||
| AccMega-1 | Appendix 5 | ||
| AccElu-1 | Appendix 8 |
Time frames for completion:
A few veterans with well-built DPS toons and mules coordinating on voice: 1.5-2.5 hours
A well-built veteran DPS toon solo with mules: 2-4 hours
A well-built veteran running a solo brute with no mules: 4-5 hours
A single newbie with a well-built stalker taking their time (like getting all the exploration badges in the zones rather than just the most convenient one) over multiple sessions, or a vet running this for the first time on a Demon/Dark MM, aka just about the slowest possible way to do this with intent [cough] like @Vex [cough]: 6 hours
Navigation:
Waypoints
You can copy/paste the thumbtack commands into your chat to put a yellow waypoint marker on your screen to aid in navigation. Note the little
/thumbtack num num num
[!CAUTION] Do not eat thumbtacks
[!Note] The keyboard shortcuts for copy-paste are CTRL+C / CTRL+V for PC users, or ⌘+C / ⌃+V for my fellow [macOS]ochists.
Similarly, where opportune multiple thumbtacks are combined into a single line for a zone. The advantage to this is sharing the command with teammates and you can all just click on the waypoint coordinates in the chat window to put a thumbtack down in your user interface. Plaques are named for their appearance in the Homecoming Wiki article for the respective accolade.
/l Badge 1 [num num num] -> Plaque 2 [num num num] -> Badge 3 [num num num]
The disadvantage of this is that we have to assume a certain channel to put this information in. Local is always available, but misses teammates that are distant from you and could spam people nearby that don’t care about what you’re trying to navigate to. Team chat is great if you’re in a team, but doesn’t work at all when solo. Private global channels would work if you have one that doesn’t mind waypoint spam, but making your own global chat channel is outside the scope of this guide. We’re using the local chat channel by default here, but you can always change the start of the command to /g for team chat or such if you prefer.

Follow the yellow dot like a good boy!
Don’t forget to look up and down as well as left and right - some of the badges are on top of statues/buildings, or in tunnels underground. For plaques, you must click on the plaque to bring up its content in a pop up window in order to get credit toward the associated history badge.
Base Portals
“Base Portal” and “SG Portal” are used interchangeably, although the SG portal is preferred if your personal SG Base doesn’t have Oro crystals in it. Check step 3 for guidance buying these powers, and what else to buy from the S.T.A.R.T. vendor (this vendor is also known as the P2W vendor for veterans in the game). The easiest way to use these powers is to click+drag the Fast Travel macro from your powers list to somewhere on your power tray.
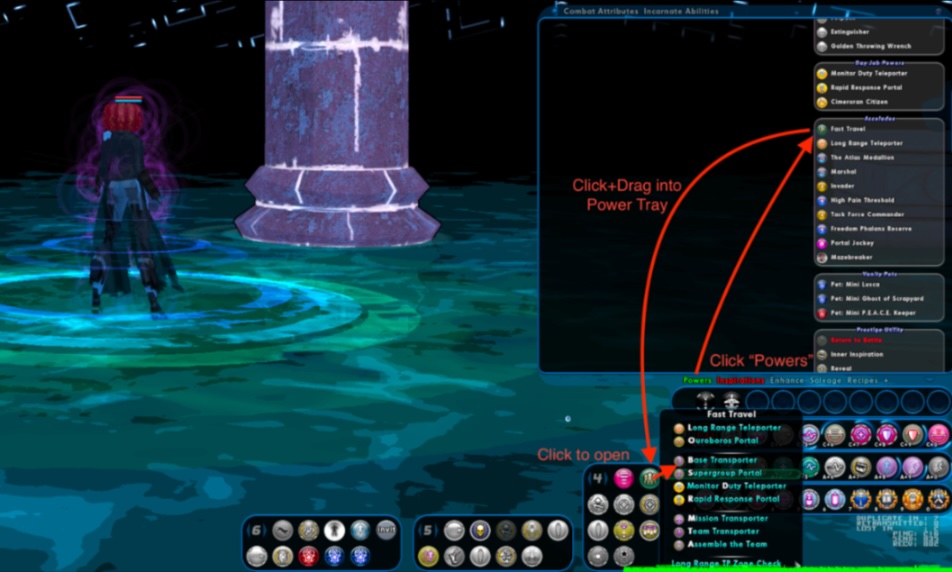
No, you don’t need to have so many trays and buttons. I’m just a hoarder.
If you need access to a SG base with Oro crystals, then I recommend the following:
On Homecoming/Excelsior, if you like a base with a bit of personality then you can use the Fedexers Anonymous base by copy/pasting the following macro to put a pink button on your power tray. You can click that button near any SG portal to teleport into the Fedexers Anonymous base.
/macro_image Accolade_Mark "Excelsior - Fedexers Anonymous" "enterbasefrompasscode FEDEX-38489"
Alternatively, use the following macro to get access to the Cosmic Teleport Base. The Cosmic base is kind of the semi-official option for Excelsior, and so is useful but sparse.
/macro_image "Teleportation_LongRangeTeleport" "Excelsior - Cosmic Platform" "enterbasefrompasscode COSMICTRANSPORT-6608"
On Reunion, another good option is the following base:
/macro_image "TalonsOfVengeance_Inferno" "Reunion - Intrepids" "enterbasefrompasscode TORCH-236"
There are lots of other options out there for you to explore if you talk to the SG Registrar in AP City Hall. If this guide calls out for you to use a SG portal and then gives coordinates, then that means to use the map’s SG portal and save the SG portal power for a more opportune time.
Oro Portals:
An Oro Portal is a useful shortcut for moving aorund the city. You can plant one anywhere, and it will endure for five or ten minutes. Clicking on the portal when it’s planted will teleport you to the Ouroboros zone - a small floating island at the end of time. Clicking on the same portal again after you enter will give you the option of exiting to any of a dozen different zones in the city. As well, there is an Echo portal behind the building that will teleport you to any of half a dozen “obselete” zones that are from early in the game’s history but house important badges or plaques or story arcs.

It’s kinda like Penn Station in here!
Oro is also where people will frequently host one of the variety of raids available to play.
If You Don’t Have Access to Ouroboros Yet:
From Atlas Park, go to Recluse’s Victory via the elevator at:
/thumbtack -172 -641 -1130
Across the large room from the portal you entered through is a manhole entrance at:
/thumbtack 1269 -663 -1539
…which will take you to Pocket D and grant you the Oro portal power in the Fast Travel macro.
Alternatively, you can ask in local somewhere with a few people, like at Ms. Liberty in Atlas Park or in the middle of Pocket D, and someone should spawn one shortly.
To use the LFG system to quickly teleport around the city:
Click the LFG item at the top of the Chat window, go to the tab for the content you want to teleport to (usually the Task Force tab), and click the radio button to the left of the task force contact you wish to go to. Check that no other TFs or such are also checked in this menu - otherwise you might end up going to seemingly random places in the game.
Then, click the radio button at the bottom of the LFG window for “Lock the Event for Your Group”, then hit the “Queue” button. The LFG window should then disappear, and shortly afterward a window should pop up asking you to either “Join Queue” (green button) or “Leave Team” (red button). Once everyone on your team has hit the green button you should be transported directly to your desired contact.
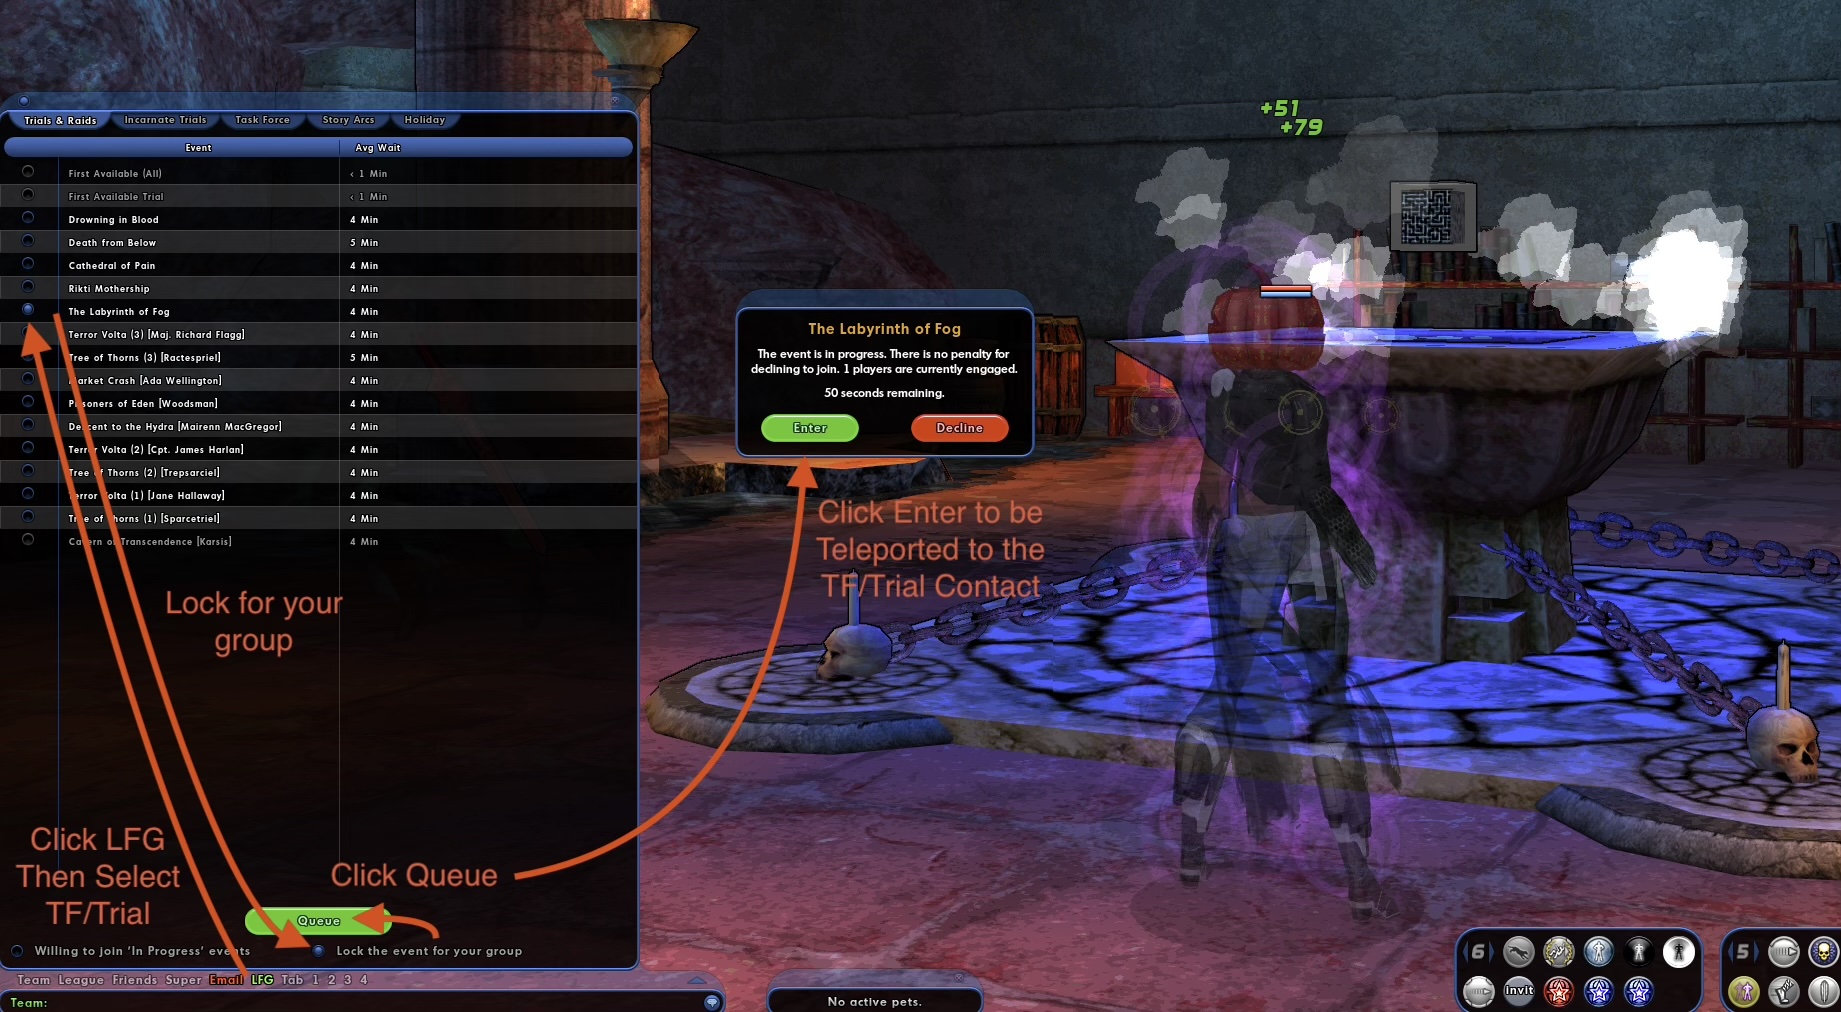
Yes, it’s obtuse. It’s also fast.
LFG Has Some Limitations:
Everyone on the team must be able to start the TF in order for LFG to teleport the team to the contact. If someone on the team is too low-level, or the TF in question is limited to those that have completed an arc to talk to the contact, or some members are the wrong alignment, etc. then the team will not be able to use LFG to teleport to that contact. Once the team is all in the right zone and meets the minimum level for the TF, however, only the leader must have completed the arc in order to start the TF for the team.
General Tips
If you don’t have much verticality with your travel power, then you should pick up several hours worth of the “Jet Pack” temporary power from the START vendor in Atlas Park, Mercy Island, or Pocket D.
Set your
This is designed for level 50, but we have had a successful run with a level 36 with some counter measures around them being too low for some of the LFG options, and they had to join someone else’s team for all of Portal Jockey.
Outside of the kill missions, your pets are going to be more of a liability than a benefit so just run without them until you need them.
(Maybe) Save Some Time:
Some of the steps here have an associated “/settitle nn” command indicated, e.g.
1 - The Unbroken Spirit - /settitle 17
This is a time-saving measure intended to allow you to quickly check to see if you have the required badge for that step or not. It is completely optional to employ this, and if your toon still has the mold nipples on it then it’s safe to assume that you have none of the badges.
If you’ve been playing that toon for a minute then, for example, you can check on your Unbroken Spirit status by monitoring system chat and then typing:
/settitle 17
If you see:
…in system chat then you have the badge. If, instead, you see:
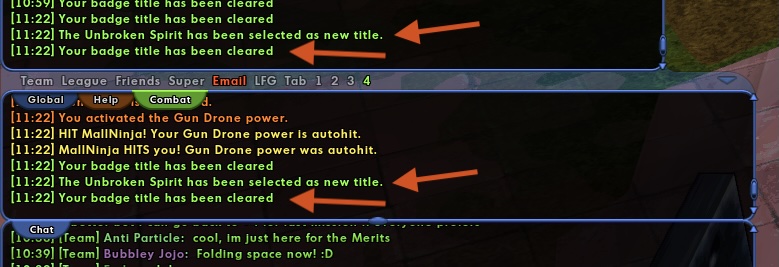
…then you have not earned that badge yet and you should go through the step’s instructions.
Get the Train Rolling
Starting from a trained and equipped (with a decent travel power) but otherwise raw level 50 Vigilante alignment toon in Atlas Park, set for difficulty to -1x1.
1 - The Unbroken Spirit
/settitle 17
AccFP-1
Go to The Abyss via the Smuggler’s Submarine (not the Smuggler’s Ship - they are different) in Fort Trident via the door in Atlas Park at:
/l Atlas Park -> Fort Trident [-534 5 -639]
Once in the Abyss, let a Giant Monster kill you four times. Turn off armors and pets to speed this up. Use the Hospital to resurrect each time, rather than a self-res or such - the goal is to accrue enough exp debt to get the achievement badge
If you have enough patrol exp built-up then you should be awarded this badge right there and then. If you do not have enough patrol exp, then you will get the requisite debt but not the badge until you earn enough exp to negate the debt. Odds are that running through this guide will pay off that debt and get you the badge before the end.
2 - Oro and the Alpha Slot Unlock
/settitle 1390
Go to Oro and talk to Mender Ramiel at:
/l Mender Ramiel [452 665 -883]
…to run the Alpha incarnate slot unlock arc (~5 missions). You can LFG to Posi and Lady Grey when you need to talk to them in Steel Canyon and Rikti War Zone respectively. The mission in RWZ is a good time to use your weekly “auto-complete this mission” allowance if possible.
[!Tip] Once you get to RWZ, it’s quick and convenient to run Levantera’s “Join the Vanguard - Chapter 1” Arc so that you can start earning Vanguard Merits. This takes about five minutes.
[!WARNING] You may get hit with the “Curse of Weariness” while going through this arc if you get hit by Captain Holtz. If you do, you’ll notice that you suddenly have half of your normal max endurance, and therefore half of your recovery, while your attacks now cost twice as much endurance. These effects combine into a debilitating nerf. If you don’t have high defense then you should use some purple inspirations for this fight to minimize the chances of getting hit with this curse. To combat this curse, you can either play a different toon to let the curse wear off over the course of a day or craft “Nectanebo’s Curse Breaker” at one of Vanguard’s crafting tables at:
/thumbtack 401 -69 -2322This will require 50 Vanguard Merits however, and to gather these merits you will be forced to run the “Intro to Vanguard” arc from Levantera at:
/thumbtack 326 -69 -2394…and then kill Rikti, which may be difficult with the curse.
Once you’ve completed the arc, use the Oro portal to get back to Atlas Park.
3 - Atlas Park and the START Vendor
AccAM-1
Go to Atlas Park and grab all of the Atlas Park exploration badges to get most of the way toward the ten badges necessary to unlock LRT. Grab the following exploration badges and plaques:
/l Rookie[128 16 -233]->Observant[-136 -94 469]->Top Dog[131 320 -320]->Freedom[126 171 -652]->Insider[282 16 -891]->Pupil-1[495 4 -1133]->Undefeated[545 58 -2307]->Patriot[164 -768 -673]->Chaos[-145 -784 -902]->START[231 21 -336]->Croatoa[557 74 -1416]
Some tips if needed:
- Observant is inside the building
- Top Dog on top of the big status behind Ms Liberty
- Patriot is inside City Hall
Top Dog, Pupil-1, and Undefeated are required for AccAM
At some point in this step you should get the accolade “Passport” as well as the expected badge and 5 reward merits - this is just the accolade for getting all of the exploration badges in Atlas Park. Check your Most Recent badges for clarification.
Pick up some useful purchases at the START vendor as budget allows:
Buy These Now - Sell Your Soul to Dave Grohl if You Must
He rocks too hard because he’s not a mortal man!
| Name | Category | Cost | Description |
|---|---|---|---|
| Jet Pack | Temp, Fly | 50k | Max this out and refresh it when possible. All of the temp fly powers are functionally the same, the other version just cost more and look different. |
| Reveal | Prestige, Utility | 10k | Removes the fog-of-war from mission and open world maps. Very useful for speeding content. |
| Return to Battle | Prestige, Utility | 1M | A self-res that also applies tier-3 inspirations like a level-up. This is free after you get the Unbroken Spirit debt badge if you’re running out of souls to sell. |
| Envenomed Dagger | Temp, Attacks | 500k | Max this out and refresh it when possible. This applies a solid -regen debuff to targets - it’s enough to take an aV fight from “I think he’s regenerating as quickly as we’re doing damage” to “Ok, it’s not fast, but we’re making progress with every attack.” |
High Priority - Selling Your Body Under an Overpass Doesn’t Make You a Villain, Right?

It’s a harddifficult life for heroes that are just starting out.
| Name | Category | Cost | Description |
|---|---|---|---|
| Base Teleporter | Prestige, Teleport | 1M | You’ll probably use this a few times while following this guide if your SG base has good infrastructure, and it comes in handy in teams when you’re short on TT. |
| SG Portal | Prestige, Teleport | 10M | You’ll use this frequently in rotation with BT, or as your primary if your personal SG base doesn’t have Oro crystals or extensive teleportation portals in it. |
| Recovery Serum | Temp, Buffs | 500k | This power will add ~2 end/sec for four minutes, so it can help immensely with endurance issues when you know you want to play aggressively or you’re in for a long AV fight but you don’t have the budget or knowledge yet to solve your endurance issues. |
Medium Priority - Farming is Beneath You… Until You Want TT

You were supposed to farm the fire, not fire the farm!
| Name | Category | Cost | Description |
|---|---|---|---|
| Assemble the Team (ATT) | Prestige, Teleport | 1M | Teleports other members of your team on your current map, and some NPCs, to your location. This is useful for speeding, but the half hour recharge handicaps it relative to Incandescence. |
| Mission Transporter (MT) | Prestige, Teleport | 1M | This will teleport only you to the mission door. |
| Team Transporter (TT) | Prestige, Teleport | 10M | This will teleport the teammates near you to the mission door. This gets very heavy use in teams. Check if it’s up in your Fast Travel macro, but if so announce that you’re queueing it in team chat and then just run it. A lot of people try to save theirs, but outside of specific circumstances you should just use it if it’s up. |
| Resuscitator | Temp, Utility | 5M | Max this out and refresh it when possible. It’s an easy way to resurrect people with just a 1-minute cool-down. Is it a shitty res? Yup. It still gets someone back onto their feet though. |
Low Priority and Aesthetic - If You Want to Sit at the Cool Kids Table With Us

I dedicate this meeting to the god of PANCAKES!
| Name | Category | Cost | Description |
|---|---|---|---|
| Power Analyzer | Temp, Utility | 250k | This lets you see the combat attributes for enemies. It’s helpful to see exactly how debuffs are working once you start digging into the numbers side of the game. |
| The Blackwand and/or Nemesis Staff | Prestige, Attacks | 100k | Which one you pick, or both, depends on a lot of specifics for your toon and playstyle. Origin damage bonus, knockback or not, solo or team play, etc. You can only pick up three of the temp attacks, so ranged toons should pick up these two and one of the melee, and vice versa for melee toons. These are solid attacks at low levels, but lose their impact at high levels - except for double wielding NemStaffs at the end of a Zoe TF. |
| The Ghost Slaying Axe and Sands of Mu | Prestige, Attacks | 100k | See above about the ranged attacks. |
| Flying Disc, Snowball, and Toy Bat | Prestige, Fun | 100k | These are not combat skills, just for RP and farting around. |
| Athletic Run, Beast Run or Ninja Run | Prestige, Travel | 1M | These are functionally identical, so pick whichever suits your toon best. New toons start with Athletic run, so revoke Athletic first or pay 1M for each of the others. |
| Inner Inspiration, Mystic Fortune, and Secondary Mutation | Prestige, Utility | 500k | The first choice is free. Inner Inspiration is arguably the most useful, but the others are popular in very specific niches. |
Finish off Step 3 by heading to Croatoa via the train at:
/l Train to Croatoa [557 74 -1416]
Starting the Tour
4 - Croatoa
AccGeas-1
Grab the Barrier Holder exploration badge, run a circuit around the Southern Island in Lake Salamanca to look for the Loch Ness MonsterSally sticking her head out of the water. Wait for your entire team to be in Croatoa so they get credit too, and then smack her lightly. One hit and she’ll go back to her underwater tunnels for half an hour or so, and you’ll get the
/l Barrier [385 0 1689] -> Island [-136 -24 193] -> Faultline via SG Portal [-895 32 1984]
5 - Faultline
Grab the Old Fashioned exploration badge, and then use the highway gate directly North to get to Skyway City.
/l Donut [-170 74 -1504] -> Skyway City [-64 0 -1918]
6 - Skyway City
Grab the Room for Expansion exploration badge and then hop onto the helicopter for a ride to Kings Row.
/l Room for Expansion [687 0 -141] -> Get to Da Choppa! [840 32 -104]
7 - Kings Row
AccAM-2
Grab the two plaques and the Upgraded exploration badge and then use the LFG system to teleport to the The Rule of Three [Positron Pt. 1] Task Force, which is toward the bottom of the LFG list.
/l Pupil-4 [-400 4 1760] -> Upgraded [-490 101 768] -> Pupil-3 [-168 -33 -1467] -> LFG to Posi
8 - Steel Canyon
Grab the Nimble Minx exploration badge and then head to Boomtown by using the wall gate directly East.
/l Nimble Minx [-2428 48 -3406] -> Boomtown [-2880 0 -3520]
9 - Boomtown
Grab the Phalanxer exploration badge and then head to a SG base with an Oro crystal by using the SG Portal.
/l Phalanxer [-2428 48 -3406] -> Oro Crystal via [-1434 0 5357]
[!Caution] All teammates must use the same SG base this time.
I understand the ghosts being down here, but you’d think that mages would have more resources, and more class, than to kidnap mystics into dank caves under Perez Park.
10a - Spelunker Badge
AccAM-3
/settitle 72
Make sure that your
Use an Oro crystal to start the “
Talk about a recon-in-force.
You should now have the
10b - Perez Park
AccAM-4
Grab the
/l Pupil-5 [-1174 -29 2252] -> Nebula's Memory [-1452 -29 2990] -> Oro Portal
11 - Oro to Echo: Galaxy City
AccAM-5
AccCrey-1
Next AccAM Step - Next AccCrey Step
Use the Echo portal behind the building in Oro to head to Echo: Galaxy City, grab the
/l Bird Watcher [-1099, 48, -2263], Pupil-2 [-752 5 -1550] -> Echo: Rikti Crash Site [508 64 -1658]
You should now have the
12 - Oro to Echo: Rikti Crash Site
AccMega-1
Fist yourself at the Ace exploration badge and then head back to the echo portal to go back to Oro.
/l Ace [1359 293 -273] -> Echo to Oro [1359, 293, -273]
13 - Oro to Talos Island
Use the Oro portal to get to Talos Island and grab the Last Line of Defense exploration badge, then use the SG portal to get to Striga Isle.
/l Last Line of Defense [-966 228 6910] -> SG Portal [-1116 162 7355]
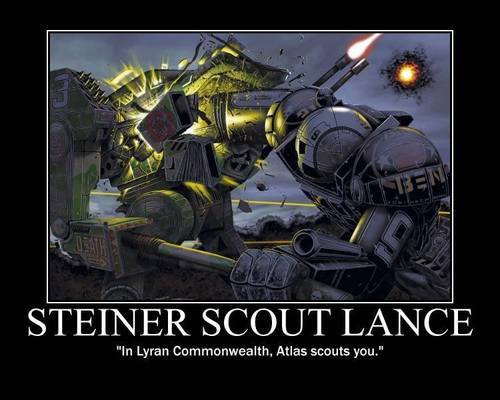
Clearing Out Some Trash

I get that it’s more effective, but it’s so expensive. Do I really need to pour silver into the tips if I’m shooting a 50BMG at them?
14 - Striga Isle
AccAM-6
/settitle 34 and /settitle 35
Grab the Vampyri Watcher exploration badge, then patrol around the swamp in the center of the island, just North of the base teleporter, to kill 200 Werewolves and 200 Vampyres for the defeat badges
[!Note] If you’re doing this as part of a team then you might consider running the first two missions of the Moonfire Task Force at -1x8. The contact is near the base portal in Striga. These two missions will get you ~160-200 kills for both Werewolves and Vamps.
Once you have the two defeat badges here, you should be awarded the accolade
/l Vampyri Watcher [-3729 424 -3011] -> Kill Wolves and Vampyres -> SG Portal to Terror Volta [-3546 -32 -493]
15 - Terror Volta
AccMega-2
Grab the Danger! Danger! exploration badge and then head to Independence Port via the the wall gate directly North.
/l Danger! Danger! [1215 144 -6728] -> Wall Gate to IP [1216 185 -7232]
[!Note] Terror Volta is a good place to hunt for 100 Lost bosses for the
Finder defeat badge and progress toward theVanguard accolade. If you want to do the hunting now, follow the large pipes south from the Danger! badge to the reactor, turn east through the front courtyard of the reactor, and then look for another section of pipe about halfway back to Danger!. Repeat this loop a handful of times and you should find yourself with the badge.
16 - Independence Port
AccCrey-2
Grab the
/l Crey Havoc [-441, 1, -269] -> LFG to Manticore TF
17a - Brickstown
AccPJ-1
Grab the Forward Thinker exploration badge and then grab the
/Forward Thinker [254 32 -1344] -> Scholastic-2 [-229 8 -370] -> Scholastic-3 [-3463 4 2062] -> Dakota Berg [-376 0 399]
17b - Bloody Hands
AccTFC-1
/settitle 549
 I am the nightmare that scares!
[!Note] You can skip this step if you already have Bloody Hands or if you’re teamed up with someone who does that doesn’t mind leading for the bank missions later.
Set your
/l Dakota Berg [-376 0 399]
Accept his mission, enter the door nearby, wait for Ms. Lib and Manticore to stfu, talk to Ms. Lib yourself, tell her “No, I’m ready”, and then follow the waypoints through the Vanguard compound and talk to the various people or computers indicated.
Once you’re in the second mission, set your
[!Tip] If -1x8 is too much for your toon to handle, then you can set it for a lower difficulty, clear what you can, log off for a minute to reset the mission, log on, run the first part of the mission again, reset, etc. as many times as necessary to kill 25 of Malaise’s Nightmares for the badge.
18 - Rikti War Zone
Talk to Levantera and run her “Welcome to Vanguard: Part 1” arc.
/l Levantera [329 -69 -2394]
This arc is simple to run, especially if you just hunt for monkeys for the 10 kills required, but allows you to collect Vanguard merits when killing Rikti. These VG merits can then be turned into reward merits. Once you’ve completed Part 1, accept the first mission in Part 2 from the same contact. Don’t worry about completing the mission, you just need an active mission to switch to later.
Grab the Lifesaver exploration badge and then head to Crey’s Folly via the wall gate directly Northeast.
/l Lifesaver [-425 15 -207] -> Highway Gate to Crey's Folly [-576 0 -448]
19 - Crey’s Folly
AccMega-3
AccCrey-3
Next AccMega Step - Next AccCrey Step
Grab the
/l Crey Watcher [1080 0 2320] -> Savant-2 [7227 37 -554] -> Savant-3 [2566 4 2683] -> LFG to Dr. Khan
20 - Founder’s Falls
AccPJ-2
AccMega-4
Next AccPJ Step - Next AccMega Step
Grab the
/l Scholastic-1 [1725 -8 2400] -> Watchful Eyes [4245 261 4571] -> Savant-2 [4244 3 3689] -> SG Portal to Khalisti Wharf [3061 12 448]
This should get you the
21 - Khalisti Wharf
Grab the On the Shoulders of Giants exploration badge and then head to Pocket D via the SG portal.
/l On the Shoulders of Giants [4287 148 2721] -> SG Portal to Pocket D [4970 64 2499]
Switching Gears
22 - Pocket D
Grab the Big Time exploration badge and then talk to Null the Gull to
/l Big Time [-162 20 -1362] -> Null the Gull to change alignment to Rogue [-168 12 -864] -> SG Portal to Port Oakes [-229 0 -1071]
[!Note] The principal reason to talk to Null is to
change your alignment to Rogue , but you should consider asking him to make your more powerful via “Who are you?” -> “Can you make me more powerful” and then going through the rest of the options under “What can you do?” to do things like disable Group Fly and Group Teleport, auto-accept Mystic Fortune, and adjust the other options to suit your preferences.
23a - Port Oakes
AccArch-1
 If Mangioni robbed a bank would he still be a vigilante?
Grab the
/l Lorekeeper-2 plaque [-1550 35 1945] -> Hidden Getaway [365 128 -2424] -> Lord Schweiner [400 127 -2498]
23b - The Bank Missions
AccTFC-2
Set your
[!Note] You do not need to complete each bank mission to move on to the next one. Enter the mission, find the exploration badge, exit the mission, set a different mission (like the Vanguard Part 2 that you picked up in Rikti War Zone) in the mission tab of your compass, talk to Lord Schengen :eu:, abandon your current progress, talk to Lord Schwine :pig: again, and you can accept another bank mission.
[!Tip] The missions spawn in several different places around the map, however if you abandon and re-accept missions in the order listed below then you can stack several of them into the submarine directly below Lord Schwitzerland :switzerland: before needing to head to a different spot: [AP -> KR -> SKY -> STEEL -> FF] in the sub below Schweiner, then IP > Talos > PI, and then Bricks to finish.
/l AP [1542 0 659] -> KR [-249 -42 -2518] -> Sky [-648 -42 -4031] -> Steel [-4600 0 1498] -> FF [-161 0 -147] -> IP [-1210 -23 -2706] -> Talos [-1441 160 6876] -> PI [-1154 0 -3078] -> Bricks [-161 0 -147]
After getting all of the exploration badges you should be awarded the
23c - Gangbuster and Spider Smasher
AccFP-2
/settitle 309 and /settitle 314
While in Port Oakes, hunt for and kill 200 Family and 200 Wolf Spiders for the defeat badges
[!Tip] The Family congregate around the SW and Central neighborhoods of the map, while the Wolf Spiders are common in the ruined castle neighborhood on the Eastern edge of the map.
Once you’ve got those defeat badges, head to The Hollows via the SG Portal at:
/l Kill 200 Family and 200 Wolf Spiders -> SG Portal to Hollows [-533 128 39]
24 - The Hollows
Grab the Ironic exploration badge and then head to Peregrine Island via an Oro portal.
/l Ironic [207 129 -3161] -> Oro Portal to PI
25 - Peregrine Island
AccMega-4
Grab the Portal Parter exploration badge and then head to Dark Astoria via the TUNNEL portal.
/l Portal Parter [3045 0 1288] -> TUNNEL to Dark Astoria [1780 0 -1114]
26 - Dark Astoria
Grab the Life Out of Death exploration badge and then head to Night Ward via the TUNNEL portal.
/l Life Out of Death [6196 117 2444] -> TUNNEL to Night Ward [6242 0 2271]
Taking This Tour Interdimensional
tt Where’s Nick Cage when you need him?
27 - Night Ward
Access to Cimerora
AccMark-1
/settitle 987
Grab the exploration badges House Hunter, Dead but Dreaming, and Stargazer. Then use the TUNNEL portal to get to First Ward.
/l House Hunter [inside] [1800 110 -2421] -> Dead but Dreaming [901 22 1997] -> Stargazer [178 944 -227] -> TUNNEL to First Ward [1985 48 -2618]
House Hunter will grant access to Cimerora and the Imperious TF.
28 - First Ward
AccMark-2
/settitle 1794
Grab the badge The Last Word by reading all ten plaques in First Ward, and the exploration badge “Eye of the Vortex”, in the following order:
/l 1 - [-1148 32 -3229], 2 - [-544.0 35.0 -3403.0], 3 - [-472 48 -2624], 4 - [-1089 49 -2574], 5 - [-1992 44 -2428], 6 - [-1759 24 -1011], 7 - [-2314 83 -274], 8 - [-1106 19 203], 9 - Vortex [177 946 -173], 10 - [2302 240 1951], 11 - [1933 50 -2635]
…and then head to Imperial City via the TUNNEL portal at:
/l TUNNEL to Imperial City [-1150 35 -3431]
29 - Imperial City
Grab the Praetorian of Privilege exploration badge and then head to Nova Praetoria via the train.
/l Praetorian of Privilege [-1607 -13 2426] -> Train to Nova Praetoria [-2408 -238 784]
30 - Nova Praetoria
Grab the Uncivil Society exploration badge and then take the train to Neutropolis.
/l Uncivil Society [-4517 32 -256] -> Train to Neutropolis [-4573 -187 502]
31 - Neutropolis
Grab the Longshoreman exploration badge and then use the LFG system to teleport to the Dr. Quarterfield TF.
/l Longshoreman [2924 -56 1375] -> LFG to Dr. Quarterfield
32 - Fire Base Zulu
Grab the Dimensional Sojourner exploration badge and then head to The Storm Palace via the portal.
/l Dimensional Sojourner [5981 1120 916] -> Portal to The Storm Palace [5911 1124 787]
33 - The Storm Palace
Grab the Courting Madness exploration badge at:
/l Courting Madness [1630 -65 10144] -> Wormhole to The Chantry [1921 -31 10295]
34 - The Chantry
Grab the Red Fog exploration badge and then use the LFG system to teleport to the Sara Moore TF.
/l Red Fog [-7523 1893 4177] -> LFG to Sara Moore
35 - Cascade Archipelago
Exit the cave and jump off of the sky-island to be “rescued” closer to the nearest exploration badge, grab the Peace Walker exploration badge, and then use the LFG system to teleport to the The Beast Beneath The Mountain TF
/l The colors are calling and I must go to them -> Peace Walker [3096 1535 1502] -> LFG to The Beast Beneath the Mountain
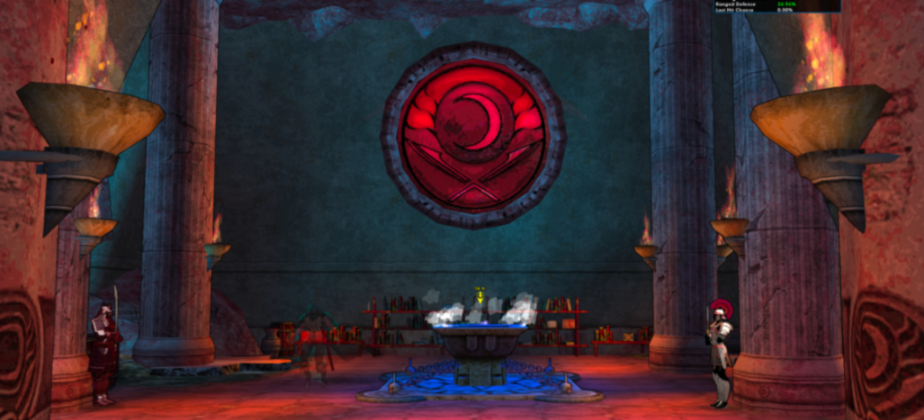
The Redder Side of Life in Paragon City
 Six seasons and a movie!
36a - Cap Au Diable
AccFP-3
AccMega-5
Next AccFP Step - Next AccMega Step
Grab
/l Technofreak-1 [-2427 232 -931] -> Lorekeeper-3 [-1712 0 -1108] -> Technofreak-2 [2345 3 1544] -> Technofreak-3: [923 21 -1422] -> Egghead [940 98 -1440] -> Part 1 of Mortimer Kal unlock -> SG Portal to Mercy Island [940 98 -1440]
This should award you the
36b - Mortimer Kal, Part 1
This step is entirely optional; it’s usually just convenient to do this now. Check you Compass>Contacts>Tips to see if you have the Wizard’s Weakness tip available. If no, then skip the unlock below.
If you do have the tip available, then accept it and the door is nearby in the university. In the mission, sneak to the other end of the building, go down the stairs, and then sneak to the other/original end of the building again to find Fiona in the middle of being captured by a group of Circle of Thorns mobs. Free her, then talk to her and select the option “I am bad news.” This will complete the mission and queue up a second part, which you will do later.
Head to Mercy Island via the SG portal at:
/l SG Portal to Mercy Island [701 13 -1440]
37 - Mercy Island
Grab the The Next Big Thing exploration badge, read the Lorekeeper-1 plaque, and then use an Oro portal to get to Grandville.
/l The Next Big Thing [-1215 239 -153] -> Lorekeeper-1 [-907 97 -380] -> Oro to Grandville
38 - Grandville
AccElu-1
Grab the Overlord exploration badge and then LFG to the Trepsarciel - Tree of Thorns 2 Respec Trial.
/l Overlord [1358 -441 -596] -> LFG to the Trepsarciel - Treespec 2 trial
39 - Nerva Archipelago
AccFP-4
Grab the
/l Locked and Loaded [3286 126 3645] -> SG Portal to Oro Crystal
[!Caution] All teammates must use the same SG base this time.
40a - The Unlucky Artifact
AccFP-5
/settitle 340
Use an Oro crystal to start the arc “
You should now have the achievement badge
40b - St. Martial
While you’re in St. Martial get the Deuces Wild exploration badge and then use the LFG system to teleport to The Temple of the Waters TF, about 3/4 of the way down the list.
/l Deuces Wild [-3325 -29 -434] -> LFG to Temple of the Waters TF
41a - Sharkhead Isle
AccFP-6
AccMega-6
Next AccFP Step - Next AccMega Step
Grab the
/l Freak of Nature [1228 90 -2183] -> Lorekeeper-4: [-832 0 -403] -> Kal [-1476 0 -396] -> SG/Oro
At this point you should be awarded the
[!Caution] All teammates must use the same SG base this time.
42 - Offer Soul of Akarist
AccArch-2
Make sure that your
Use an Oro crystal to start the “Offer Soul of Akarist” arc, ID 6.40 at the top of the 25-29 range. This arc consists of two short missions: the first all you have kill is the named LT at the end, and then you can ghost through the second mission and click a glowie at the end.
On completion, you should be awarded the
43 - Eden
AccMega-7
AccCrey-4
Next AccMega Step - Next AccCrey Step
Grab the
/l Savant-5 [-1313 12 4486] -> Crey Fish [-1788 0 4550] -> Savant-4 [-2817 -23 2962] -> LRT to Pocket D
44 - Pocket D
Talk to Null the Gull again and change your alignment back to
/l Null the Gull [-168 12 -864] -> SG Portal to Oro Crystal [-229 0 -1071]
[!Caution] All teammates must use the same SG base this time.
Joking With Jenkins
This section is entirely about the Portal Jockey accolade, and the steps can be done in whatever order you wish since they’re all in either the Portal Corp area of PI or in your SG Base. This part also has a fairly hard level limit of 50 - you can do it lower by hopping onto teams running the arcs from the contacts rather than through Oro crystals, but this is a pretty specific [and slow] way to do it unless you’re working with other people who know what they’re doing.
Set your
45 - Multidimensional
AccPJ-3
/settitle 172
Use an Oro crystal to start “The Hydra Dimension”, level 40-49 arc ID 1.10. Enter the mission and then LFG to the Terror Volta [3] Trial, or quit and reform the team outside. Upon exit you should have the
46 - Shrouded
AccPJ-4
/settitle 173
Use an Oro crystal to start “The Black Shroud Dimension”, level 50 arc ID 1.17. Enter the mission and then LFG to the Terror Volta [3] Trial, or quit and reform the team outside. Upon exit you should have the
47 - Antimatter
AccPJ-5
Use an Oro crystal to run the arc “The Instant Army”, level 40-49 arc 18.55.
This is a ~10 mission arc that takes about half an hour to run that lets you killarrest
[!Note] You can also get credit for killing Antimatter by participating in “Keyes Island Reactor” Incarnate Trial, which would obviate the need to run this arc.
48 - Dimensional Warder
AccPJ-6
/settitle 57
Go to Peregrine Island and talk to Maria Jenkins at:
/l Maria Jenkins [-1045 0 -2785]
Her first mission option is “Battle the Praetorian threat.” Accept this mission and you should be assigned “Defeat Infernal & his guards” - complete this mission.
After dousing Infernal, Jenkins will give you a choice between two missions - the first option will always be “Run a patrol for Warwork activity” (note the single capitalization in “Warwork”). Ignore this first option for the purposes of this guide.. Her second option will be a random choice of AV missions. You will accept these random AV missions, and then immediately abandon them, until you see either “Take down the WarWorks” (note the double capitalization in “WarWorks”) or “Fix the Scanner”.
This accept->abandon process may take a frustrating number of iterations to get one of these two options. I recommend sacrificing three and a half chickens to RNGesus, BBQ sauce be upon him, within a week prior to running this. You’ll have to do both these options, and you can do them in either order, but these instructions will assume that you see WarWorks/
48a - Take down the WarWorks
Complete the mission by taking down
[!Note] If you can’t stand dealing with RNGesus, or you just don’t feel like sacrificing a chicken today, then you can run the Level 50 Oro arc 1.15 “A Hero’s Hero”. The third mission in this arc will have you fight Siege. However, the second mission in this arc is a “Kill All Werewolves” that is going to take a lot longer to clear than the accept/abandon process will take to shortcut right to Siege.

My dice need to be re-calibrated - they keep landing on a weird looking number one. Maybe I’m low on blinker fluid.
48b - Fix the Scanner
This will start the arc “A Hero’s Epic”, also available in TF form from an Oro crystal (level 50 arc 21.36) if you prefer to run it that way.
Continue running this arc for 11 missions, most of them AV assassinations, while avoiding Jenkins’ Warworks patrol option. After completing the arc, Jenkins will start giving you random AV missions in addition to the patrol mission, which will let you complete 48a if you haven’t already.
After completing both a and b above, you will get the defeat badge
Congratulations on finishing the guide and joining the ranks of the cool superheroes!
503 Appendix 1 - Veteran Strings
The step links will take you up to the detailed explanation, if need be.
Vet String 1
/l Abyss: Die 4x> AP: [131 320 -320] [495 4 -1133] [545 58 -2307]> Cro: Sally, [385 0 1689]> FL: [-170 74 -1504]> Sky: [687 0 -141]> KR: [-400 4 1760] [-490 101 768] [-168 -33 -1467]> Steel: [-2428 48 -3406]> Boom: [-2428 48 -3406]> SG/Oro- Arc0.02 Mystic
Vet String 2
From step 10b through step 17a
/l PP: [-1174 -29 2252] [-1452 -29 2990]> E:GC: [-1099 48 -2263] [-752 5 -1550]> E:RCS: [1359 293 -273]> Talos: [-966 228 6910]> SG> Striga: Hunt> SG> TV: [1215 144 -6728], Lost> IP: [-441 1 -269]> LFG Manticore: [254 32 -1344] [-229 8 -370] [-3463 4 2062]
Vet String 3
/l Bricks: [-376 0 399]> RWZ: [329 -69 -2394] [-425 15 -207]> CF: [1080 0 2320] [7227 37 -554] [2566 4 2683]> LFG Khan: [1725 -8 2400] [4245 261 4571] [4244 3 3689]> SG> KW: [4287 148 2721]> SG> PD: [-162 20 -1362] Null to Rogue
Vet String 4
From step 23a through step 27
/l Oakes: [-1550 35 1945] [365 128 -2424] Banks AP>KR>SKY>STEEL>FF>IP>Talos>PI>Bricks, Kill Family and Wolf Spiders> Hollows: [207 129 -3161] > PI: [3045 0 1288]> DA: [6196 117 2444]> Night: [1800 110 -2421] [901 22 1997] [178 944 -227]
Vet String 5
From step 28
/l First Ward: 1 [-1148 32 -3229], 2 [-544.0 35.0 -3403.0], 3 [-472 48 -2624], 4 [-1089 49 -2574], 5 [-1992 44 -2428], 6 [-1759 24 -1011], 7 [-2314 83 -274], 8 [-1106 19 203], 9 [177 946 -173], 10 [2302 240 1951], 11 [1933 50 -2635]
Vet String 6
/l Imperial City: [-1607 -13 2426]> Nova: [-4517 32 -256]> Neut: [2924 -56 1375]> LFG to Dr Q: [5981 1120 916]> Storm: [1630 -65 10144]> Chantry: [-7523 1893 4177]> LFG to Sara: [3096 1535 1502]> LFG to Beast Beanth the Mountain
Vet String 7
/l Cap: [-2427 232 -931] [-1712 0 -1108] [2345 3 1544] [923 21 -1422] [940 98 -1440], Kal Unlock> Mercy: [-1215 239 -153] [-907 97 -380]> Oro> Grand: [1358 -441 -596]> LFG to Trepsarciel: [3286 126 3645]> SG/Oro: Arc 6.68> [-3325 -29 -434]> LFG to Waters
Vet String 8
/l Shark: [1228 90 -2183] [-832 0 -403], Kal [-1476 0 -396]> SG/Oro: Arc 6.40> LFG to Eden: [-1313 12 4486] [-1788 0 4550] [-2817 -23 2962]> LRT to PD: Null to Vigilante> SG/Oro> Arc 1.10, Arc 1.17, Arc 18.55> PI: Jenkins [-1045 0 -2785]
Vets: Go to step 48 to finish PJ.
503 Appendix 2 - Sheer Willpower
AccWill-1
To earn the Sheer Willpower accolade you must run all of the red side task forces:
- The Beast Beneath the Mountain [Virgil Tarikoss] for the Binder of Beasts badge. /settitle 5
- Pirates of the Sky [Silver Mantis] for the Air Pirate badge. /settitle 6
- The Temple of the Waters [SF Op. Renault] for the Leviathan badge. /settitle 7
- The Crystal of Serafina [Ice Mistral] for the Crystal Keeper badge. /settitle 8
- Chasing Fool’s Gold [Dr. Aeon] for the Gold Standard badge. /settitle none
503 Appendix 3 - Geas of the Kind Ones
To finish earning Geas of the Kind Ones you must:
- Run the Katie Hannon TF (level 30-34) to get the Cabalist accomplishment badge. Note that doing this solo will be difficult, and to start the TF yourself you must run the Croatoa 4 arc from an Oro crystal. You can join someone else running the TF without running the arc.
- Kill 333 Fir Bolg for the Pumpkin Master defeat badge. /settitle 1993
- Kill 333 Tuatha de Dannan mobs for the Bane of Dannan defeat badge. /settitle 1994
- Kill 333 Cabal mobs for the Spellbinding defeat badge. /settitle 1995
- Kill 333 Croatoa Ghosts to get the Haunted defeat badge. /settitle 1996
- Kill Jack in Irons in Croatoa, either the random spawn or the War event, for the Giant Killer defeat badge. /settitle 1989
- Kill Eochai in Croatoa, either the random spawn or the War event, for the Pumpkin King defeat badge. /settitle 1990
- Hit Sally once in Croatoa for the Believer badge. /settitle 1991
503 Appendix 4 - Archmage
To finish earning the Archmage accolade you must:
- Kill 100 cold demons from the Circle of Thorns for the Coldhearted defeat badge. These include Hellfrost demons, Hoardelings, and Blade Princes. You can find these in Sharkhead Isle in the Potter’s Field neighborhood, or in Echo: Faultline at the bottom of cracks respectively. /settitle 57
503 Appendix 5 - Megalomaniac
To finish earning the Megalomaniac accolade you must:
- Kill 1000 Rikti monkeys for the Zookeeper defeat badge. You can find these most easily on monkey island in the northern extent of Peregrine Island. /settitle 1615
503 Appendix 6 - Mark and Recall
To finish earning the Mark and Recall power you must:
- Kill each of the different Seeds of Hamidon once in First Ward for the Full Spectrum defeat badge. /settitle 1800
- Defeat the Seed of Hamidon in First Ward for the Germinator Terminator Accomplishment badge. /settitle 1801
- Defeat 100 points worth of Drudges for the Lawbreaker defeat badge. A minion counts for one point, an LT counts for 2, and a boss counts for 5. You can find these by running around in Night Ward. /settitle 1896
- Defeat 100 points worth of Carnival of Light/War/Vengeance to get the Show’s Over defeat badge. You can find these in the middle of First Ward.
- Complete 25 alignment tip missions to get the Multifaceted achievement badge. This is most easily done by using a Mission Computer item in a SG base, using one reward merit to craft “Cloud of Odorous Smoke” tip, running that mission, and then repeating this 25 times.
503 Appendix 7 - Conspiracy Theorist
To finish earning the Conspiracy Theorist accolade you must:
- Kill 200 Crey Paragon Protectors to get the Infiltrator defeat badge. /settitle 1595
- Get The Doctor’s Ally accomplishment badge by running the “Investigate the hacker known as The Doctor” mission for Gordon Stacy in Brickstown. This is also available via an Oro crystal, arc ID 0.37. /settitle 1534
503 Appendix 8 - Elusive Mind
To finish earning the Elusive Mind accolade you must participate in Rikti Invasion events. These are fairly rare most of the time, but they are spawned whenever a team completes a Lady Grey Task Force, so this can be forced. During the week when the LGTF is the Weekly Strike Target (WST) thse TFs are done with great regularity.
- Kill 25 unexploded bombs during Rikti Invasion events for the Bomb Specialist badge. /settitle 509
- Kill 10 Heavy Assault Suits during Rikti Invasion events for the Chief badge. /settitle 510
- Kill 100 Rikti during Rikti Invasion events for the Sentry badge. /settitle 508
In Development - Feedback Is Appreciated
Fedexer’s Anonymous Guide - 504: The Labyrinth
A Brief, 6000 Word, Introduction to the Labyrinth
Written by Theo, with the assistance of HK and Tart
Last Checked - 2026May
Why This is Worth Doing
The labyrinth is an interesting place to explore, but not many of the resources that you get here have much value in the rest of the game. However, if you run through this part of the game there are two accolades that you can earn here that can be quite useful with +10 MaxEnd and +5% MaxHP, similar to the core accolades in guide 503, and you can benefit from the use of Draught of the Fog inspirations that provide small but useful buffs.
Be aware that if you don’t move for about ten minutes then you will be kicked out of the labyrinth.
Shortcut References
Once you’ve run through this guide you’ll understand why this is front and center, but if this is your first time then don’t worry about it for now. Fastest way to renew MotG:
/l Antechamber > Green > re-enter 2x > > Green Sewer > Fwd > look up and 90deg right to [-1173 -219 1351]
Getting to the Door
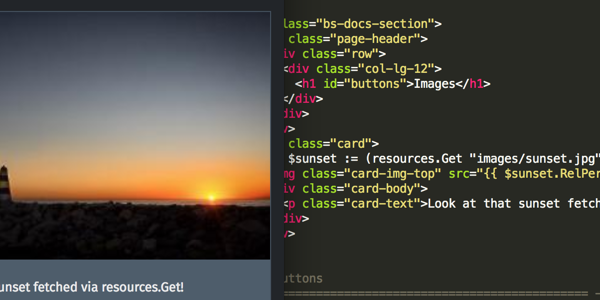
The Labyrinth is a rather different bit of the game. Navigating it and achieving objectives isn’t difficult, but it is confusing for your first few hours. I recommend reading through at least the steps that you’re interested in in their entirety before starting out. The Labyrinth consists of vaguely familiar maps strung together through doors. Upon entering the Midnighter Club, either via one of the college campuses on the map or by LFGing to The Labyrinth of Fog trial, you can enter the labyrinth by clicking on the black rectangle above the table at:
/thumbtack -35 6.8 -63
 Why is the icon for the Midnighters colored like sunset?
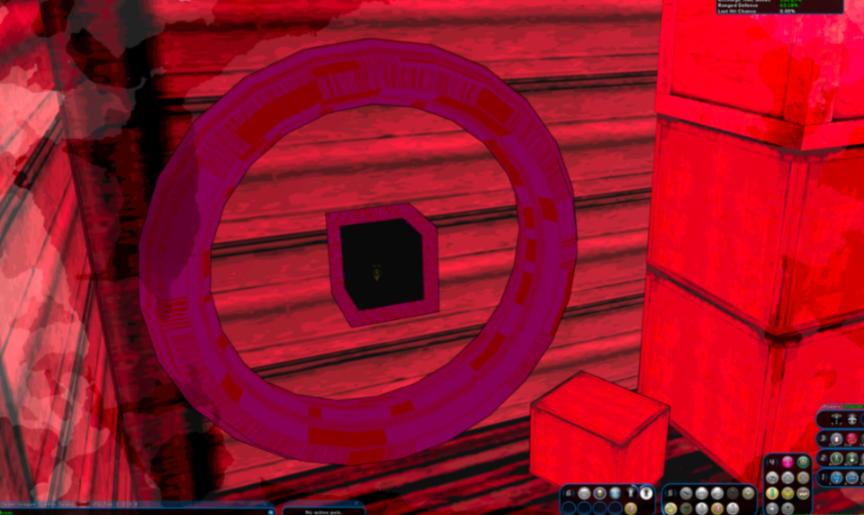
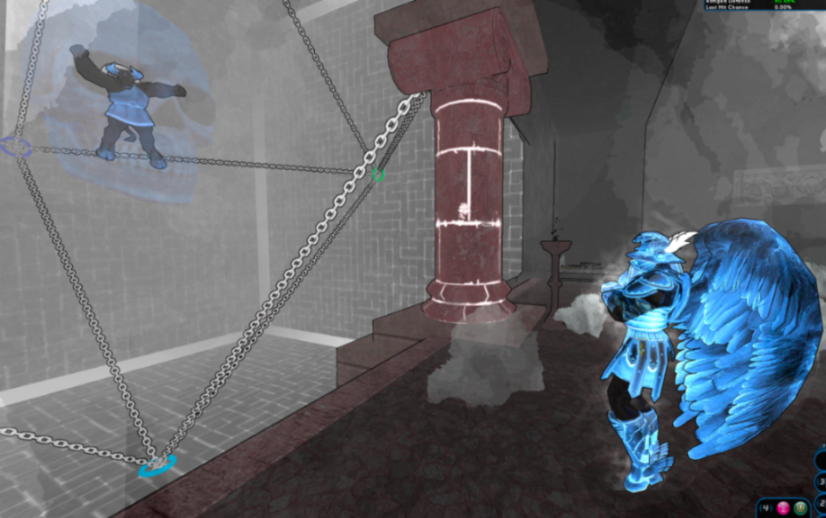
This will put you into an Antechamber with four colored portals around the perimeter and a large black doorway/rectangle in the center, hereafter referred to as the Phantom Gateway, or PG. The colored portals will teleport you into a map of the same color, and the PG serves as a portal directly to special locations in the labyrinth, like the Colonnade and the Core.
 You’ll get very familiar with this room.
If you’re part of a team in the labyrinth, you can use the temp power “Follow through the Fog” to teleport to team-mates when they find a fog to kill.
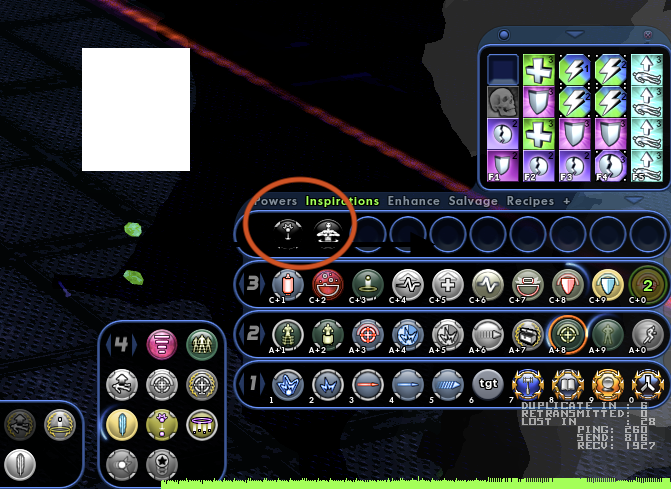 “Follow Through the Fog” and “Escape From the Fog”.
The mobs within the labyrinth are all rank upgraded, e.g. normal minions are now lieutenants, as well as being high level, spawned in large groups, and embedded with various high powered Elite Bosses, AVs, Gladiators, and Memories. These spawns are lethal to individual toons, and even sneaking through the labyrinth is complicated by spawns of enemies with higher perception. Even if you’ve managed to stack enough level shifts to make them con grey, these mobs remain dangerous.
As well, while traveling through the maze you will occasionally run up against a methed-out flying super minotaur that is basically guaranteed to two-shot you while also mezzing squishies. Unless you’re in a serious group that knows what they’re doing, if you see the big black bull of pain then just run while planning to die within the next ten seconds.
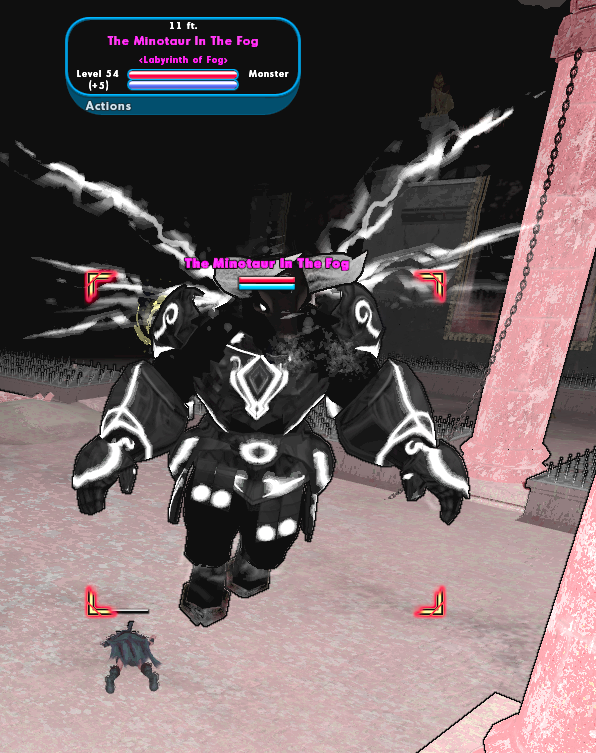 No kink shaming.
You can exploit the fact that the doors are frequent by repeatedly clicking a door that you just went through to be shunted into a different part of the labyrinth. The minotaur will usually try to follow you through doors, but repeatedly entering the door you just went through can build up enough of a lead to throw him off of your trail, or give you time to use “Escape From Fog” to get back to the foyer of the labyrinth.
The Minotaur is also a big boy, and he can get stuck in geometry while chasing you. Look for really tight spaces to take shelter in if need be.
Some doors require that you have specific costumes, so it’s handy to have them ready beforehand if you’re badgehunting: Bodacious Bovine - Costume: Nictus Minotaur and Costume: Cimeroran Minotaur (10 Aether each) both work, so it’s your preference for which to have. Maybe some other costumes would work?
49 - Minotaur Kill Raid
Frontrunners on the servers occasionally run Minotaur Raids on the Excelsior server, usually following Hami or Mothership Raids. These are pretty passive events for most of the attendees, with the best way to do things distilled to a science for the most part.
You’ll see an announcement in the LFG channel, head to the labyrinth, and then broadcast that you’re looking for an invitation to the league. Once the league is of sufficient size then some trusted players, usually on Team 1, will scout the labyrinth for enemies called “Coagulated Pollution”, typed as Memory enemies. These guys are basically Giant Monsters, except normal sized, at level 55+1. They are to be avoided when solo, but when part of a mob of superheroes ~40 strong? Well, that’s just an engineering problem.
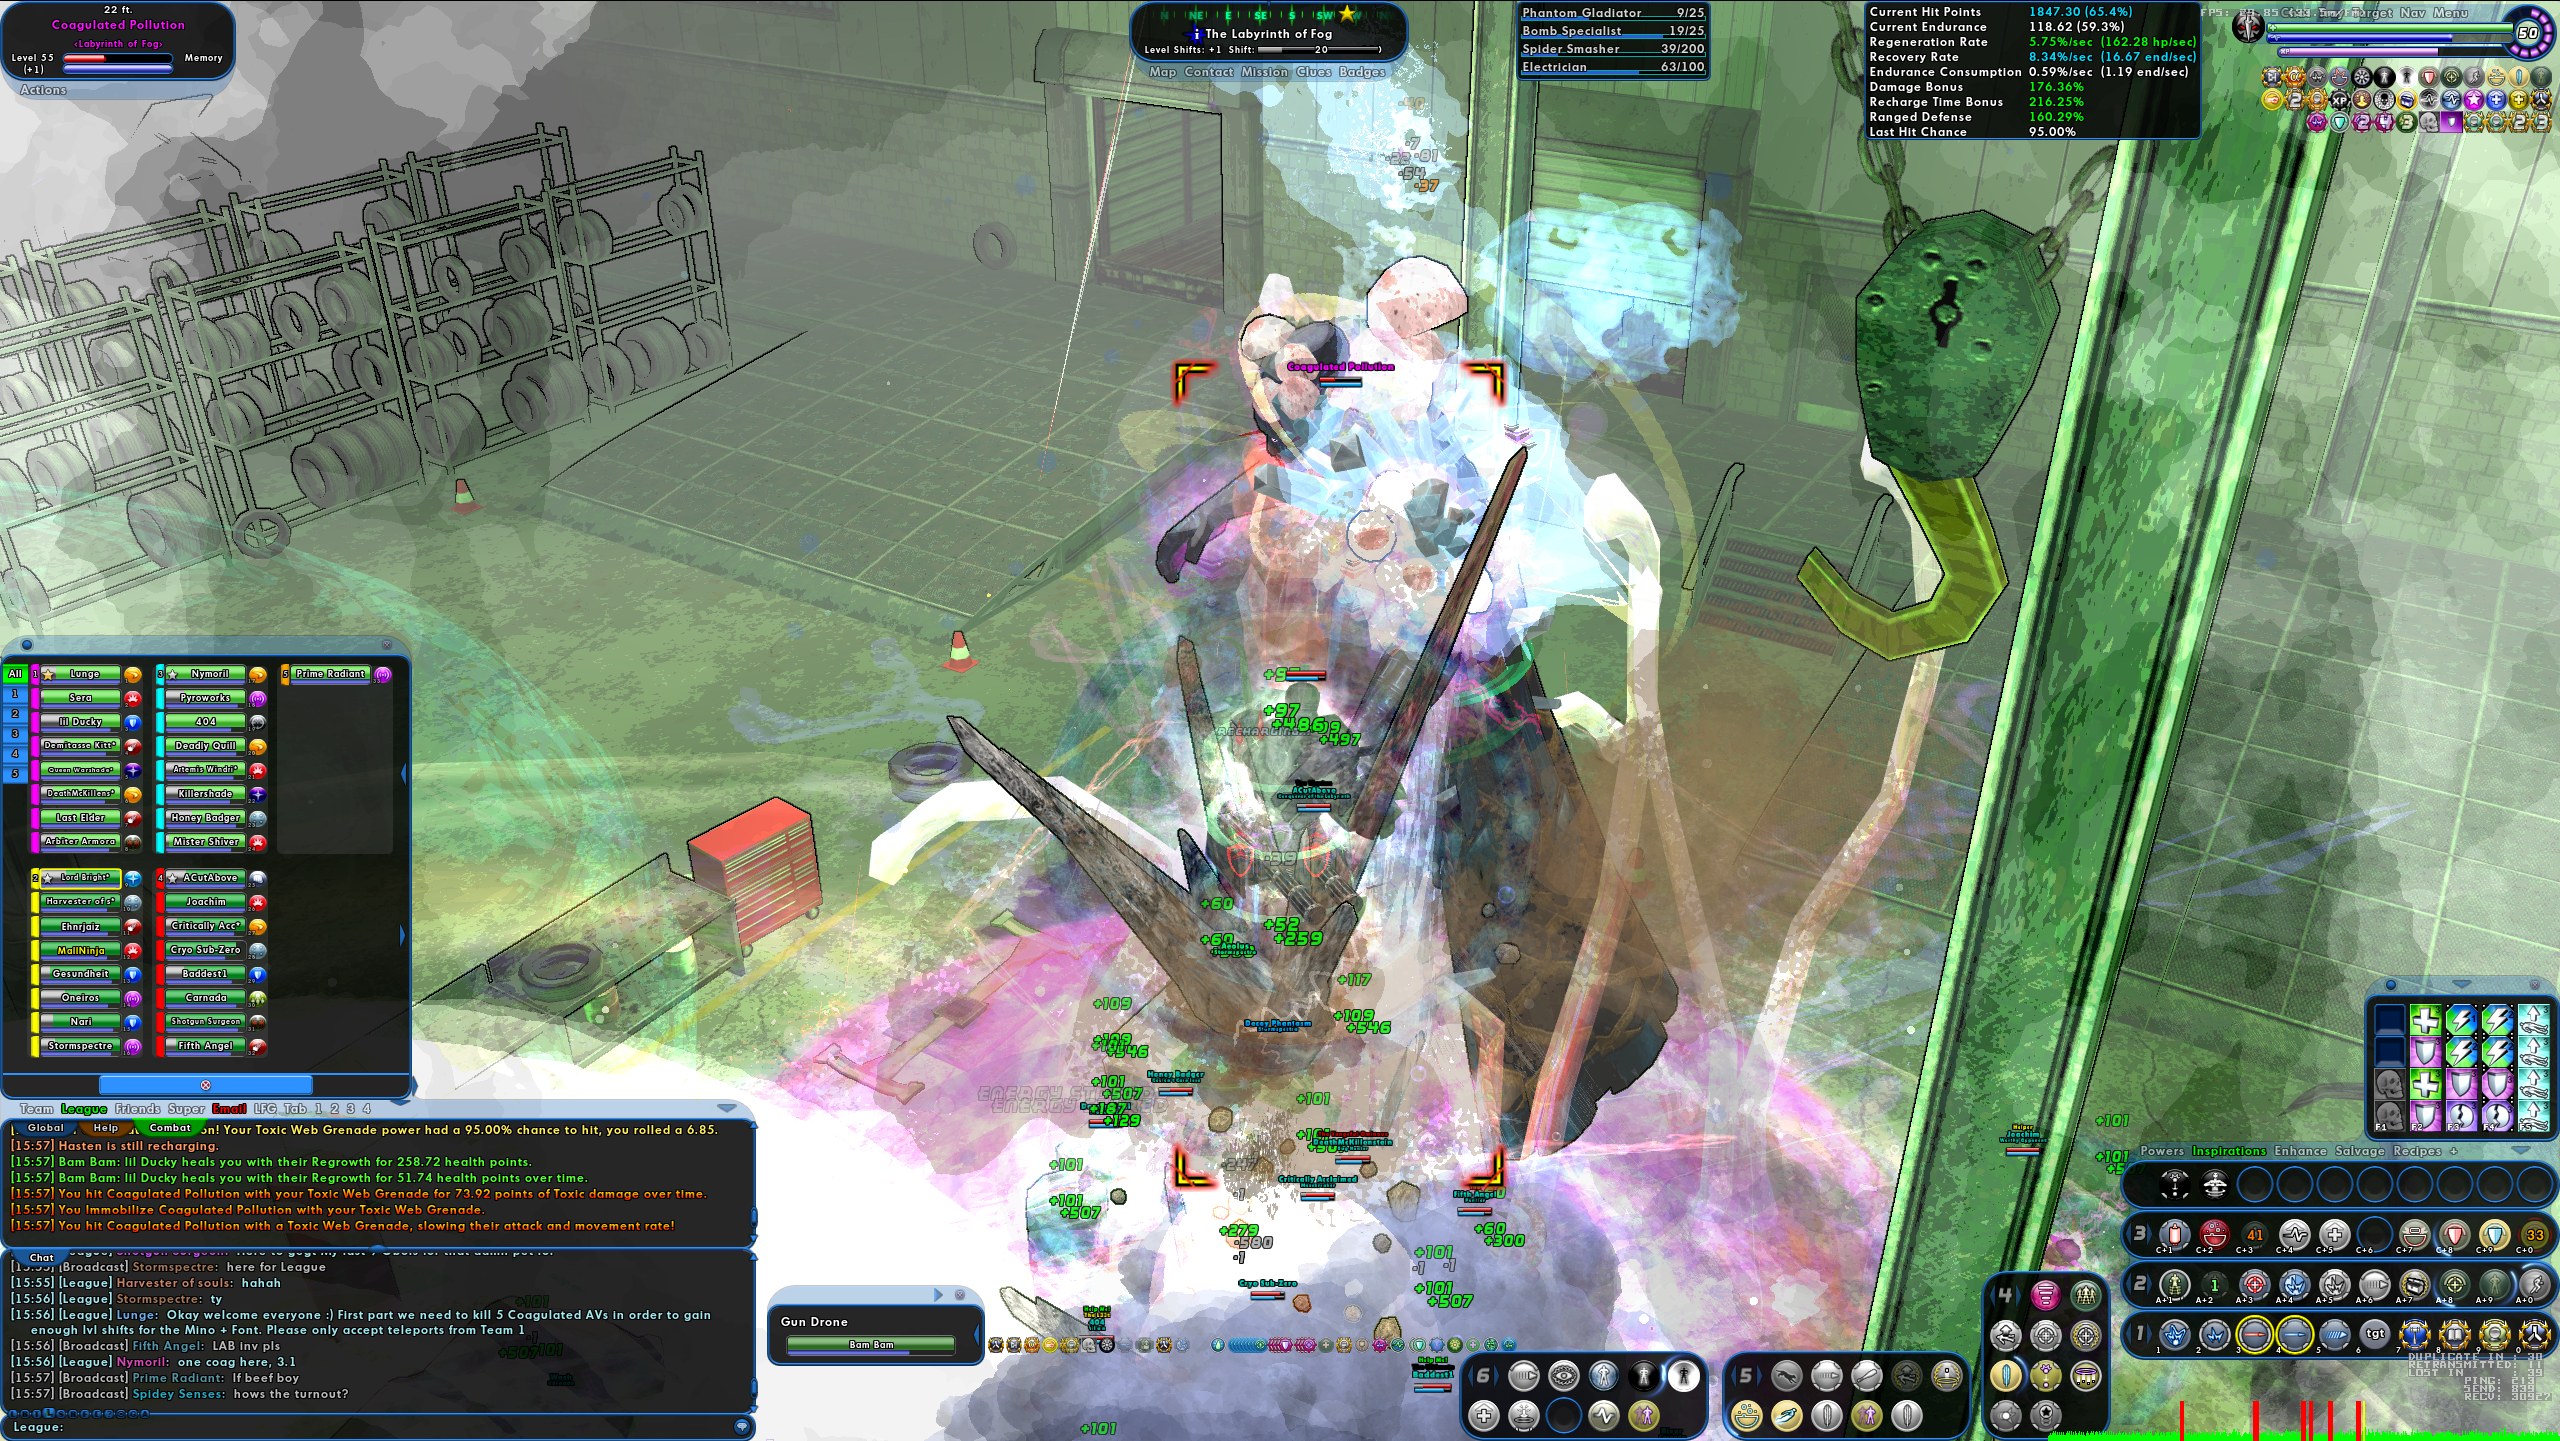 Welcome to The Jungle, big fella.
Once the league takes down five of these Memory enemies, you will have stacked enough zone points to have enough level shifts to be able to take down the Minotaur. The big, black, beastie will quickly realize that he’s in for a fight rather than a merry walk through the labyrinth and will challenge the league to fight him in his “special” room. It’s a safe assumption that you’ll have both enough support and enough dps to chew through him here, even as he goes through his phases of increased armor and super attacks.
When you’ve got a nice surplus of ground beef to supply the next BBQ, the league will be transported into an arena of sorts.
 Nancy, I know you’ve got a nice supply using time travel, but you really must start cultivating some of this silphium in the modern day. It tastes and smells wonderful.
50 - The Colonnade and The Fogs
Steps 50a and 50b are likely to happen concurrently - while hunting for Fogs for 50b, you’ll likely be randomly teleported into the colonnade, so you should be familiar enough with 50a to recognize when that happens and what to do with the opportunity.
While running through the labyrinth, keep in mind that Draughts of the Fog will increase your stealth and provide you with a level shift. You can buy Draughts in the auction house for cheap, or salvage them from kills in the labyrinth.
Buff from Draughts: +1.83% recovery (~0.20 end/sec on my AR/Dev blaster), +6% damage, +5% recharge, +5% tohit, and +55ft of stealth, as well as +1 level shift.
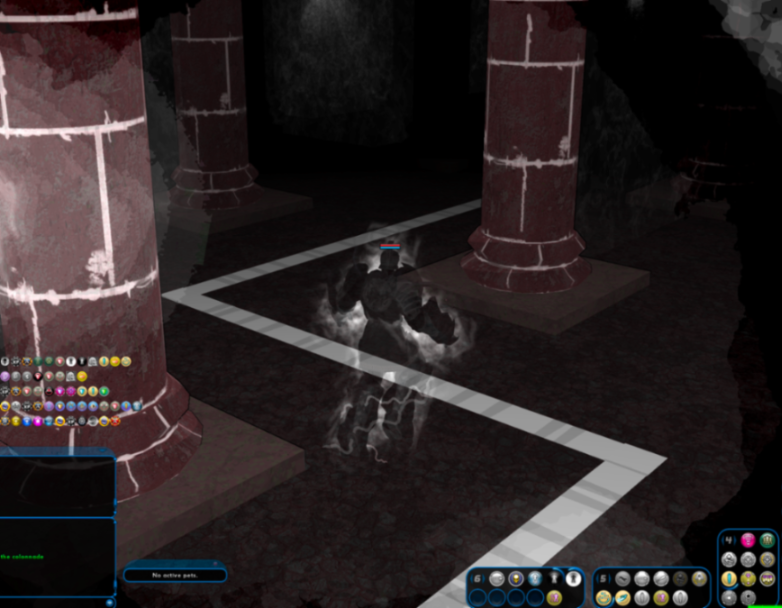
50a - The Endless Colonnade
The Collonade is a large, dark, room with normal colors that is filled with dull red columns. There is a random chance to get here every time you go through a door in the labyrinth. You will get a exploration badge, Hidden in The Fog, just for finding the colonnade (or any of 8 hidden locations in the Fog). If you make it to the end of the colonnade you will also get the exploraiton badge Lab Rat.
Note that this level is safe from the minotaur’s patrols.
 It’s like looking into parallel mirrors.
To get to the end of the Colonnade, you must procure several inspirations called Draught of Fog. These can be bought either from the NPC The Dealer of Death (in the Core at:
/thumbtack 447 -250 2442
…or from the auction house for a couple thousand inf each (recommended), or salvaged from kills inside the Labyrinth. In the Colonnade, use one of these inspirations and follow the white line will appear on the ground. When the white line disappears after ~30 seconds, cancel the inspiration on your status bar and then eat a new one. If you’re well accustomed to the process and fast moving then you might be able to only use one inspiration. Most of my toons can get it done with two inspirations with time to spare.
 Follow the white
 rabbitline.
If you’re going to run through most of this Labyrinth guide in one [long] effort, then be sure to hit the Mote of Apathy at the end of the colonnade run, at:
/thumbtack 7146 -798 68
…and be sure to click on it for credit.
 It should trigger when you get close. Should. Click it anyway.
50b - The Core
To get to the Core, you must either attend a Minotaur Kill Raid (for the Slayer of the Minotaur defeat badge), team with someone in the core to teleport to and then grab the Greek Philosopher badge, or hunt through the labyrinth and kill 5 Malevolent Fogs (for the Malevolent Intoxication defeat badge). After achieving either of these, you can then use the power Escape From the Fog to go back to the Antechamber and then use the PG to teleport to the Core.
Breathing Deeply - Hunting for Malevolent Fogs
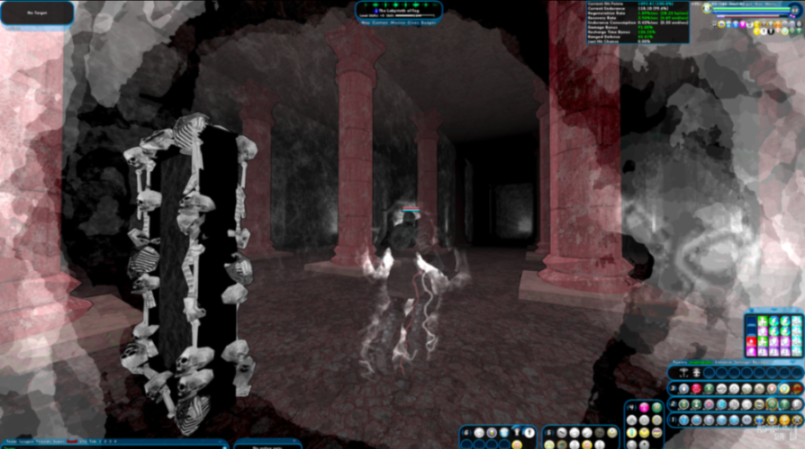
The Malevolent Fog mobs look like bright white floating skulls surrounded by a bright white circle. One might think that they would be obvious when searching for them, but there are enough mobs with white aura effects or such that they can be easy to miss. Look carefully in large rooms, behind corners and in closets and such. They are fixed spawn points, but it’ll take you a while to see the regularities. Until then, just wander the maze looking for them and avoiding the minotaur.
The Fogs themselves are big bags of hitpoints, but are otherwise trivial to bring down. The danger is in aggroing nearby mobs or staying in one spot for long enough that you get a pair of horns inserted somewhere unpleasant.
 The sneaky buggers will hide in geometry, behind boxes, or under stairwells. Despite their proximity to nearby groups, they do not attach to them or share aggro though.
How to show your Philos for Sophia
Grabbing the plaques - the tips only apply if you’re grabbing these plaques in the listed order. Some manner of flight is helpful to combat the lower gravity within the core if you aren’t used to it. As with most of the rest of the Labyrinth, the water here is only good for drowning.
Single-line version of the table below for easy copy-paste in game:
/l 1- [465 -201 2713]; 2- [403 -242 2744]; 3- [580 -112 2800]; 4- [545 10 2853]; 5- [229 -82 2663]; 6- [280 -96 2406]
| Plaque Location | Hint (if needed) |
|
|
|
Look down |
|
Look up, and go left around the building |
|
Look up |
|
|
|
At this point you should have the Greek Philosopher badge, and thus the ability to teleport right to the Core from any of the black rectangle portals in the labyrinth.
Labyrinth Missions - aka, How to Get Your Ass Handed to You in Even More Ways
The Watcher, Teleute:
/thumbtack 413 -205 2779
The Watcher will give you random missions here that you can complete for Obols. There is nominally a different int he 10 vs 15 obol missions, but functionally there isn’t much of an increase in difficulty. Once you get through all of the seven colors available, and the four bosses available, you’ll have a chance at her giving you white-colored Apathy missions that are worth 25 obols in exchange for defeating all four of the bosses.
Determining which mission type is best for you depends on what you’re playing and who you’re playing with.
To aid in keeping track of what colors/bosses you need for the badge, I use the following shorthand and update it in every mission in local chat:
/l roygbva - fahahuwa
This is short for: red;orange;yellow;green;blue;violet;apathy - Fang;Hammer;Hunter;Watcher
…which, as you complete colors/bosses and capitalize the representative characters, turns into the following when done:
ROYGBVA - FAHAHUWA
Once you complete this sequence, you will have the badges Tested By Combat and Chromatic Combatant. If you’ve also got the Malevolent Intoxication badge, for killing Fogs, then you’ll also get the Mazebreaker accolade that gives you +5 MaxEnd while in the labyrinth.
Vendors, and How to Spend Obols When You Can’t Actually Die
Standard Vendor - Coffin Full of Jars:
/thumbtack 465 -252 2438
Merit Vendor - Aptonetus:
/thumbtack 370 -189 2626
P2W and Obol Vendor - The Dealer of Death:
/thumbtack 447 -250 2441
The main appeal for spending obols here is either the ethereal roman costume pieces for 220 obols total, or stuff like the 10k obol mini pet. Buying the Draught inspirations, or converting the obols to merits, is an excellent way to waste your time.
Tailor - Seamstress Terzi:
/thumbtack 470 -189 2612
Trainer - Warmaster Pentalabrys:
/thumbtack 559 11 2639
Phantom Gateway Portal:
/thumbtack 374 -183 2661
51 - Motes
The motes are ~1ft cubes suspended within a ~4ft torus that are hidden around the levels of the Labyrinth. They each provide small individual buffs, which will be consolidated into a single buff called “Mote of the Gladiator” once you have gotten near all seven individual motes and then visited a specific gladiator in the Core.
 Why does this jelly donut taste like trigonometry?
Once you complete this section on a given toon, to the point of getting all of the mote buffs condensed into the singular Mote of the Gladiator (MotG), then you’ll notice that the buffs disappear upon exiting the Labyrinth open-world areas. Entering Labyrinth missions also counts for losing the mote buffs. However, once you get MotG you can renew the consolidated buff by approaching any mote in the Labyrinth, or paying one Obol to the Dealer of Death.
The buffs from MotG: +3% defense to all, +3% resistance to all, +1.83% recovery (~.20 end/sec for my AR/Dev Blaster), 0.46% regen (~0.62 hp/sec on my blaster), +6% damage, +5% tohit, and +10% recharge. Very helpful on their own, but these buffs also stack with the Draught buffs.
To find all of the motes:
Mote of Apathy - White
Use the instructions for The Colonnade to navigate to the end of the run.
Mote of Cowardice - Yellow
From the Antechamber, enter the Green portal. Turn around and go through the same door that you exited five times and you should arrive in a yellow-tinted version of the Praetorian underground map. From the entry point, go forward through one intersection, turn right at the second intersection, forward through the third, and then head for the mote toward the upper right of the large room at:
/l Cowardice/Yellow Mote: Antechamber > Green > Re-enter 5x > Yellow Praetorian Underground > Fwd/Right/Fwd > [-2663 -352 2428.5]
Mote of Despair - Blue
From the Antechamber, take the Red portal. Turn around and go through the same door that you excited three times and you should arrive in a blue-tinted Arachnos base. At the intersections, take a right and then a left. When the corridor opens up into a large room, look 90deg left and far below you at:
/l Despair/Blue Mote: Antechamber > Red > Re-enter 3x > Blue Arachnos > Right/Left > [2311.5 -504.5 -2381.5]
Mote of Fury - Orange
From the Antechamber, use the PG to teleport to the Core. From the Core, head to the orange portal at:
/thumbtack 536 -136 2500
As with the other motes, re-enter the door you exit from six times and you should find yourself in an orange-tinted council cave. Go straight through the first intersection, then left, left again, then straight at the next intersections, and you should find yourself facing a short catwalk facing a large window that looks out into a large chamber. Turn left at the window to look for a large council three-piece sliding door, then proceed through three more of those doors. Once you’re looking across the large chamber, the mote will be up and to the right at:
/l Fury/Orange Mote: Core > Orange [536 -136 2500] > Re-enter 6x > Orange Council Cave > Fwd/Left/Left/Fwd > [-3553.5 -326.5 2037.5]
Mote of Greed - Green
This one is probably the easiest/fastest to get to refresh your Mote of the Gladiator buff. From the Antechamber, take the Green portal. Turn around and go through the same door that you excited two times and you should arrive in a green-tinted sewer. Stay straight through the first room, and at the entrance to the second room look immediately up and 90deg to the right at:
/l Greed/Green Mote: Antechamber > Green > re-enter 2x > > Green Sewer > Fwd > look up and 90deg right to [-1173 -219 1351]
Mote of Jealosy - Indigo
Good stealth and fly is recommended for this one. From the Antechamber, take the Green portal. Turn around and go through the same door that you excited six times and you should arrive in an indigo-tinted icy dome. Head to the apex of the dome at:
/l Jealousy/Indigo Mote: Antechmaber > Green > Re-enter 6x > Purple Arena/Dome > [1939.8 415.5 587]
Mote of Violence - Red
From the Antechamber, take the Blue portal. Turn around and go through the same door that you excited two times and you should arrive in a red-tinted warehouse. At the intersections take two rights and then look into the back of a loading bay on the left at:
/l Violence/Red Mote: Antechamber > Blue > Re-enter 2x > Red Warehouse > Right/Right > [-906 -232.5 -489.5]
Putting the Pieces Together
From the Core, take the individual mote buffs to Deadelus’ condescending armor at:
/l Core > Daedelus [167 -75 2664]
…and he will begrudgingly rub I-don’t-know-what together to get you the Mote of the Gladiator buff and the Gladiator in the Fog costume. Note that you need only approach Deadalus’ portal to get the Mote upgrade and costume - you can leave Deaddy and his chained-up minotaur to their activities if you’d rather not interrupt them.
 No kink shaming.
52 - ???: Origin of Apotheosis
This step will get you Nightmare Seeds, which will allow a character and all alts on the same account to have the benefit of Draughts of Fog inspirations (approximately +10% recovery, +5% damage, +5% recharge, and +5% tohit for 15 minutes - the 55ft stealth and level shift only apply within the labyrinth) and the Labyrinth accolades (+5% MaxHP and +10 MaxEnd when a Draught is active) outside of the Labyrinth. Note that these toons must still complete the requirements for the accolades individually, just like with Atlas Medallion et. al.
[!Note] The effects of the Draught are not maintained across loading screens or deaths - they will last 15 minutes if you don’t see a loading screen, but will need to be renewed regularly in standard content.
Alts will need to eat a seed (can be eaten anywhere, not just inside the Labyrinth). which will kill them once, but they then will benefit from Draughts and the Labyrinth accolades for 15 minutes anywhere in the game. The new toons can also now use the PG to go directly to the Origin, will have the Effect: Fog power available, and can directly enter the Mausoleum (and collect new seeds) with Effect: Fog running without needing to run the Fragmented Echoes or such.
It is recommended, but not required at all, that you earn the two accolades Mazebreaker and Conqueror of the Labyrinth.
Before starting this stage, you should have some manner of flight power and make sure that you have three inspirations handy: an Emerge, an Impenetrable, and an Uncanny Insight Imbuement. The Emerge is easily bought on the auction house for 1,000 influence or so. The Impenetrable is more expensive, at ~1M to buy-it-now or perhaps less (or free from drops) if you plan ahead. The Uncanny Insight Imbuement is rather more expensive - when I last checked they were only four available on the AH and for more than 2M each, or you can go to Ouroboros and talk to Luna to spend 30 incarnate threads for one. This is quite expensive, but it is a one-time cost for your entire account, not just that toon, so it’s not unjustifiable.
As well as carrying the inspirations, make sure that you’re actively running the Mote of the Gladiator - if you’ve run through the Motes step above at some point in the past on this toon, then you only need to search for one mote to renew this rather than collect all 8 again. You’ll also need to wear the Gladiator In The Fog costume.
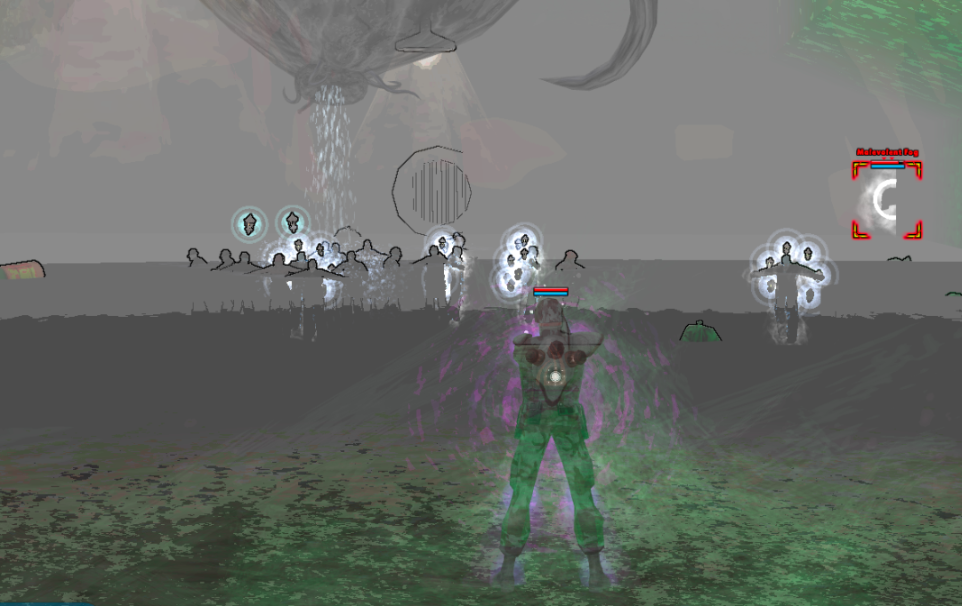
Getting to the Root of the Nightmares
To get to the Origin, you must first get the Mote of the Gladiator Buff and wear the Gladiator In The Fog costume.
After this, run around the standard levels of the Labyrinth looking for a Gladiator enemy that is hostile to you without having to click on them first. Upon getting the attention of this Gladiator, it should mez you and then teleport you to the ???: Dreamer’s Promenade neighborhood in the corrupted Atlas Park. You’ll then be awarded the Lucid Dreamer exploration badge, which will allow you to teleport directly to the Origin from the Antechamber.
If you followed a teammate into the Origin then you may need to move around a few hundred yards to get the Lucid Dreamer badge. Do not leave until you get the badge.
Confusing Sounds
Once you get to the Origin for the first time, your first task is to tickle all of the Fragmented Echoes that are spread around this corrupted version of Atlas Park.
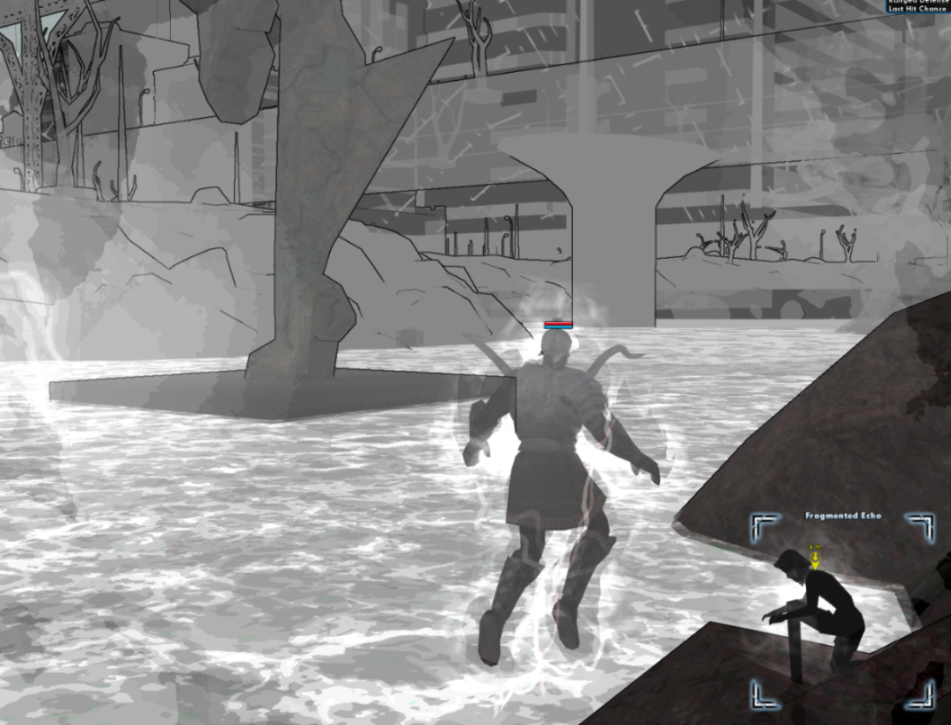 What wonderful weather.
[!Warning] Unknown if you actually do need to hit these Echos to get in, or if you can just stand in front of the hospital and eat the inspirations. Test on a fresh account? Or ignore since it’s not a big deal to hit the Echoes?
| Echo Location | Hint (if needed) |
|
Fragmented Echo 1 (City Hall) |
|
|
Fragmented Echo 2 (Train Station) |
|
|
Fragmented Echo 3 (Lake)
|
|
|
Fragmented Echo 4 (Billboard) |
|
|
Fragmented Echo 5 (Perez Gate)
|
|
|
Fragmented Echo 6 (Industrial Park)
|
|
|
Fragmented Echo 7 (Ms. Liberty) |
|
|
Fragmented Echo 8 (Building Top) |
|
|
Fragmented Echo 9 (Modern Art) |
|
|
Fragmented Echo 10 (Tunnel)
|
|
???: Enshrouded Mausoleum
High Efficiency Healthcare ™ - just surround the hospital with nightmares and graveyards.
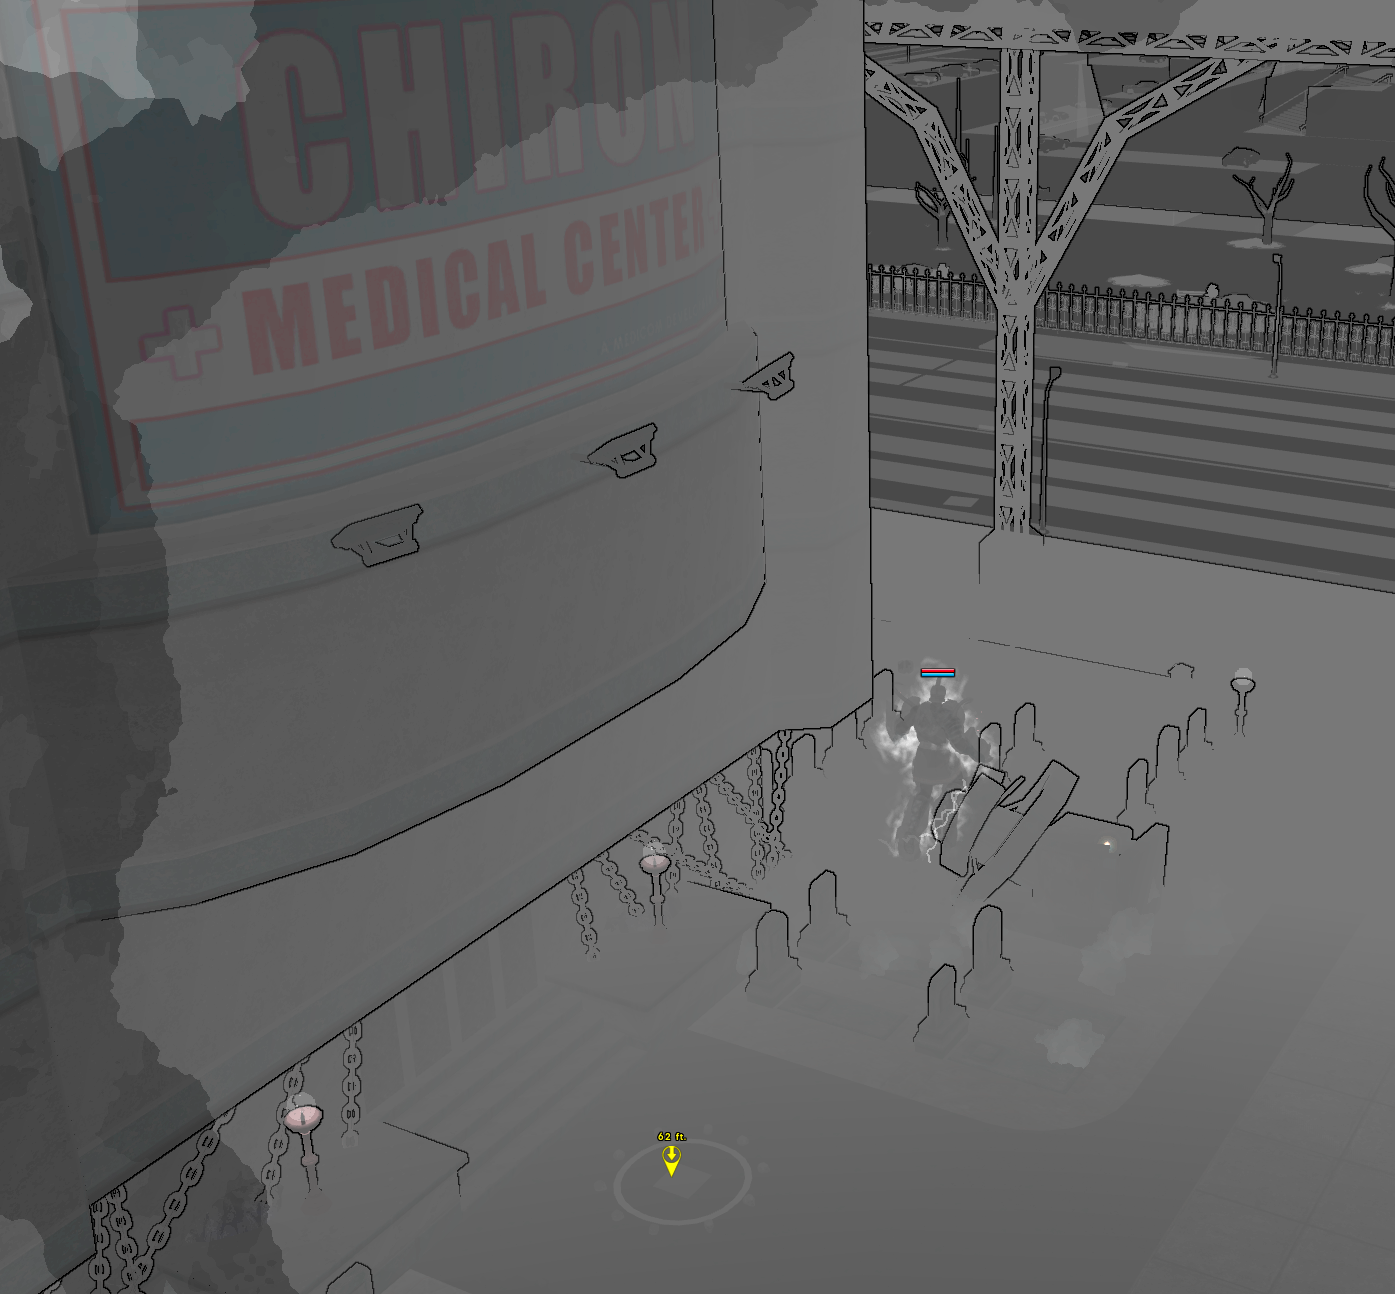 Case closure rates will go through the roof! Where’s my MBA?
To enter the Enshrouded Mausoleum the first time you will need one each of three inspirations: Emerge, Impenetrable, and Uncanny Insight Imbuement. Eat those three inspirations, in that order, while standing in the circle on the ground in front of the hospital building at:
/thumbtack 10564 0 -1664.5
[!Warning] This location is close to the patrol route of one of the Labyrinth Guardians. These guys are fast, have high perception, and will mez you before teleporting you into the Great Darkness or just killing you themselves. If you enter the Origin and then book it toward the Mausoleum then you will arrive with only a few seconds to enter before he passes near the door. However, if you wait for him to pass the door once then you’ll have ~100 seconds to enter before he passes nearby again.
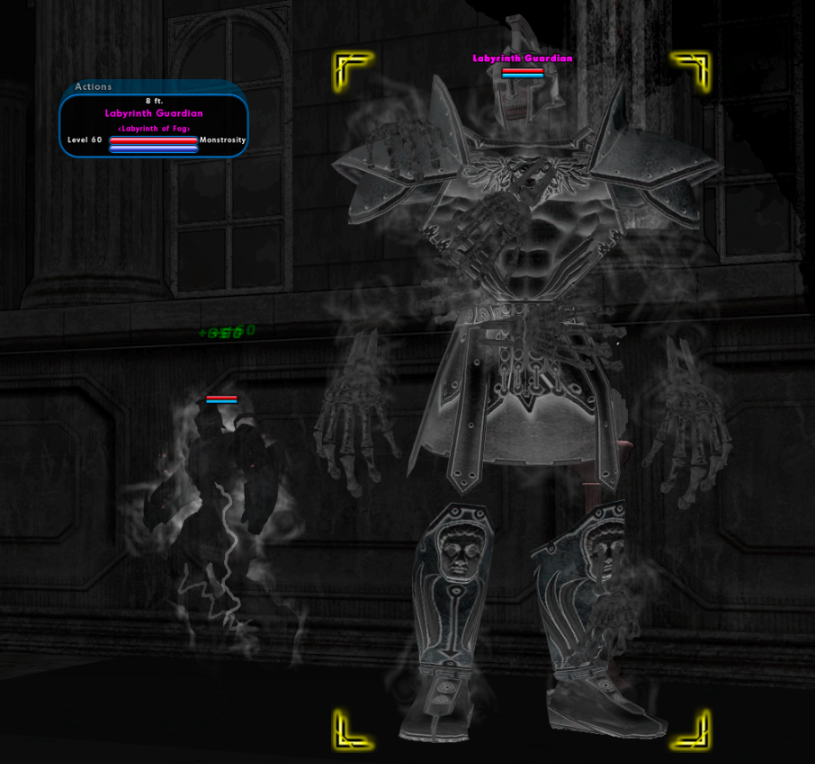 What a wonderfully bountious booty. A little bony though.
Given the cost of the inspirations, I recommend that you watch the System chat channel and confirm that you’re in the right spot by looking for a message saying: “
At this point, if done correctly, you will see a large red message pop up on your screen saying “The doors respond to you.” If so, enter the hospital and the ???: Fathomless Dark location. If not, I hope you didn’t waste that UII inspiration.
 This is taking the aesthetic of a Daft Punk concert to a whole new level.
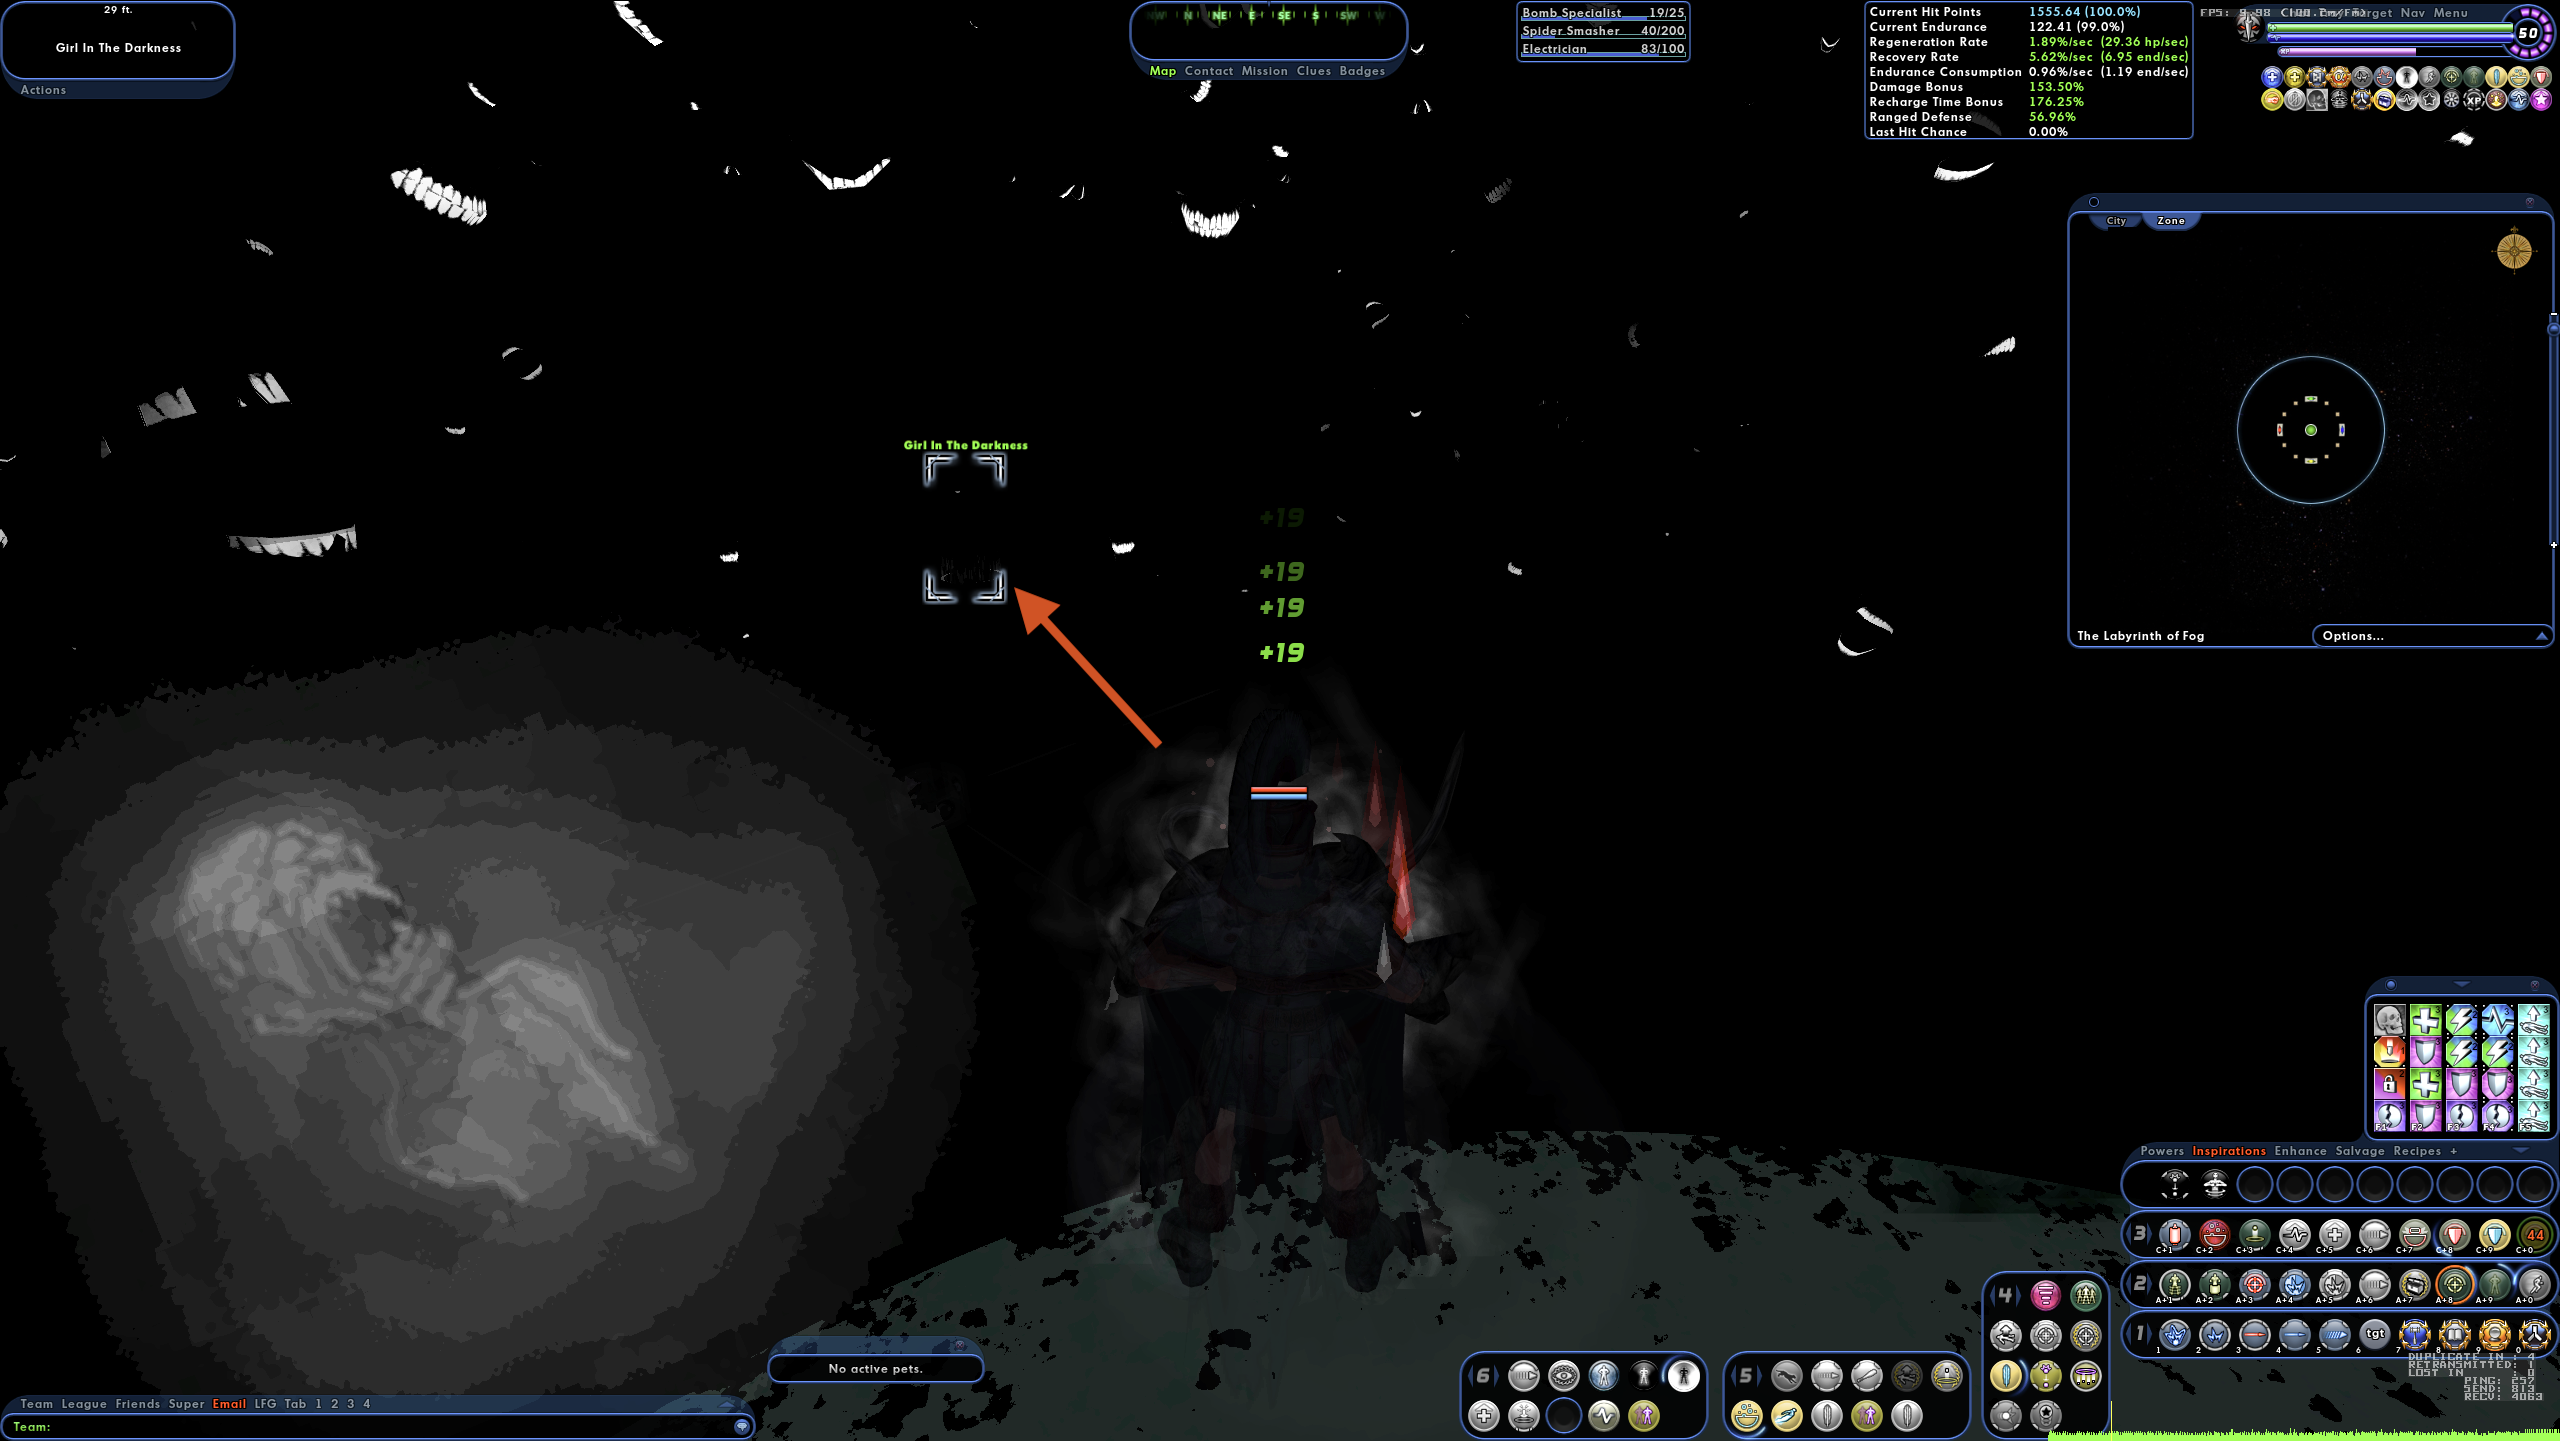
Talk to the Girl In The Darkness. Look for a circle in the darkness if you’re having trouble finding her. You can select any option you want, except for asking “What’s stopping me from taking your power by force?” - she’ll insta-gib you if you do. Fortunately, you can re-enter without having to consume more inspirations, so it’s not a big deal if you piss her off. Hit [Accept] to proceed and she will give you a Nightmare Seed inspiration.
Nightmare Seeds
Upon using the Nightmare Seed you will be immediately killed, with the intent of returning to the entrance of the labyrinth. You can use any self-res power to res right in the mausoleum though. Once you’re back upright, you’ll be able to benefit from using Draught of Fog inspirations outside of the labyrinth, both of the labyrinth accolades, and an available Effect: Fog costume modifier. This costume effect also imparts a heal-over-time effect in some areas and the water in the labyrinth now heals you rather than kills you.
If you self-res inside the Mausoleum (note that you can also return at a later date and directly enter rather than deal with the inspirations again) then you can collect additional seeds by talking to The Girl again. You cannot trade these to other players/accounts, however you can email them to alts on the same account to get the benefits on your alts.
53 - Points of Interest
The items below are all optional as of early 2026. They provide little, or no, benefit beyond exploring what the devs have created for us to enjoy and a couple of minor badges.
Dreamcatcher
This is a defeat badge that is convenient to grab while you’re running around the Origin area. Keep the Effect: Fog power active and you’ll see herds of 20 Dark Skitterers hanging around. Kill 100 of these and you’ll get this badge. The skitterers have no attacks and will scatter upon being attacked, so spike aoe dps (like judgements) is well complemented by spammed mass immobilizers and fold space.
Remember that Draughts of the Fog apply a level shift in the Labyrinth - this can increase your damage output by ~25%. It might also be worth having one or two people patrol the Labyrinth-proper for Malevolent Fogs to get more level shifts.
There are several large spawns of Skitterers in the area of:
/thumbtack 12539.5 71.2 794.0
[!Note] The Dark Walker level 55 Elite Bosses have no ranged attacks, and so are completely embarassed by a hover Blaster or floating bots Mastermind or such, and are worth 243k experience (kill 23 for a Veteran Level) and 303k influence if you’re interested. For badge progress, though, they count for the same as a Skitterer.
The Crypt
Once you have this Fog Effect active, go back to the Origin and look for a Labyrinth Guardian. Any one of them is fine, but there is usually one at:
/thumbtack 10932 -12 850
Be aware that these guys can see through normal invis at least 100ft away. If you approach slowly then he will put you to sleep and teleport you into the “???: Outer Darkness” zone, which would have killed you before the Effect: Fog but now you can explore. Blindly run toward a door at:
/thumbtack 7900 -2000 85
This door is covered with level 60 monsters, so you’ll have to draw them off, find the door, and click it before they show you their favorite Eldritch tricks. The effect here is unknown, and probably linked to future content.
Other Ways to Get the “Hidden in the Fog” Badge
If you don’t have it already, then getting into any of the following special zones will award you the Hidden in the Fog badge.
You Against the World
From the Antechamber, follow this waypoint through the Fog:
/thumbtack 441 -147 -1248
Clicking on this special door will present you with a pop-up message: “This door gives you a weird feeling. Enter the door anyway?” Click “Yes” and you will be transported into a zone labeled ???, but looks like a burning debris pile with two “People of the World” killing a copy of your character. You can either click on the floating light where you entered to leave, or try to help yourself win the fight.
Jack’s Realm
You can find Jack (the GM from Croatoa when he isn’t wandering making trouble there) in the maze. From the Antechamber enter the yellow portal and follow this waypoint through the maze:
/thumbtack 371 -459 1255
Click on this special door, Click “Yes”, and you will be transported into a zone labeled ???, but is commonly referred to as Jack’s Realm. You can either click on one of the mushrooms to leave, or play with Jack.
Dead End Train
From the Antechamber, follow this waypoint through the Fog:
/thumbtack -1805 -257 1119
Jump/Fly up above the HVAC ductwork to find a hidden door. Click “Yes” and you will be transported into a zone labeled ???, but looks like a tram with a suspicious looking post-doc riding it. You can either click on one of the door you entered through to leave, or depart the tram toward your lab in the Black Mesa Research Facility.
Boat of Doom
From the Antechamber, follow this waypoint through the Fog:
/thumbtack -25 -152 -3008
Click “Yes” and you will be transported into a zone labeled ???, but is commonly referred to as the Boat of Doom. You can either click on the door you entered through to leave, or go for a swim.
Forbidden Server Room
From the Antechamber, follow this waypoint through the Fog:
/thumbtack -1333 80 -1015
Jump/Fly up above the HVAC ductwork to find a hidden door. Clicking on this special door will present you with a pop-up message: “This door gives you a phantasmagorical feeling. Enter the door anyway?” Click “Yes” and you will be transported into a zone labeled ???, but looks like a server room in the Midnighter’s Mansion that is protected by…
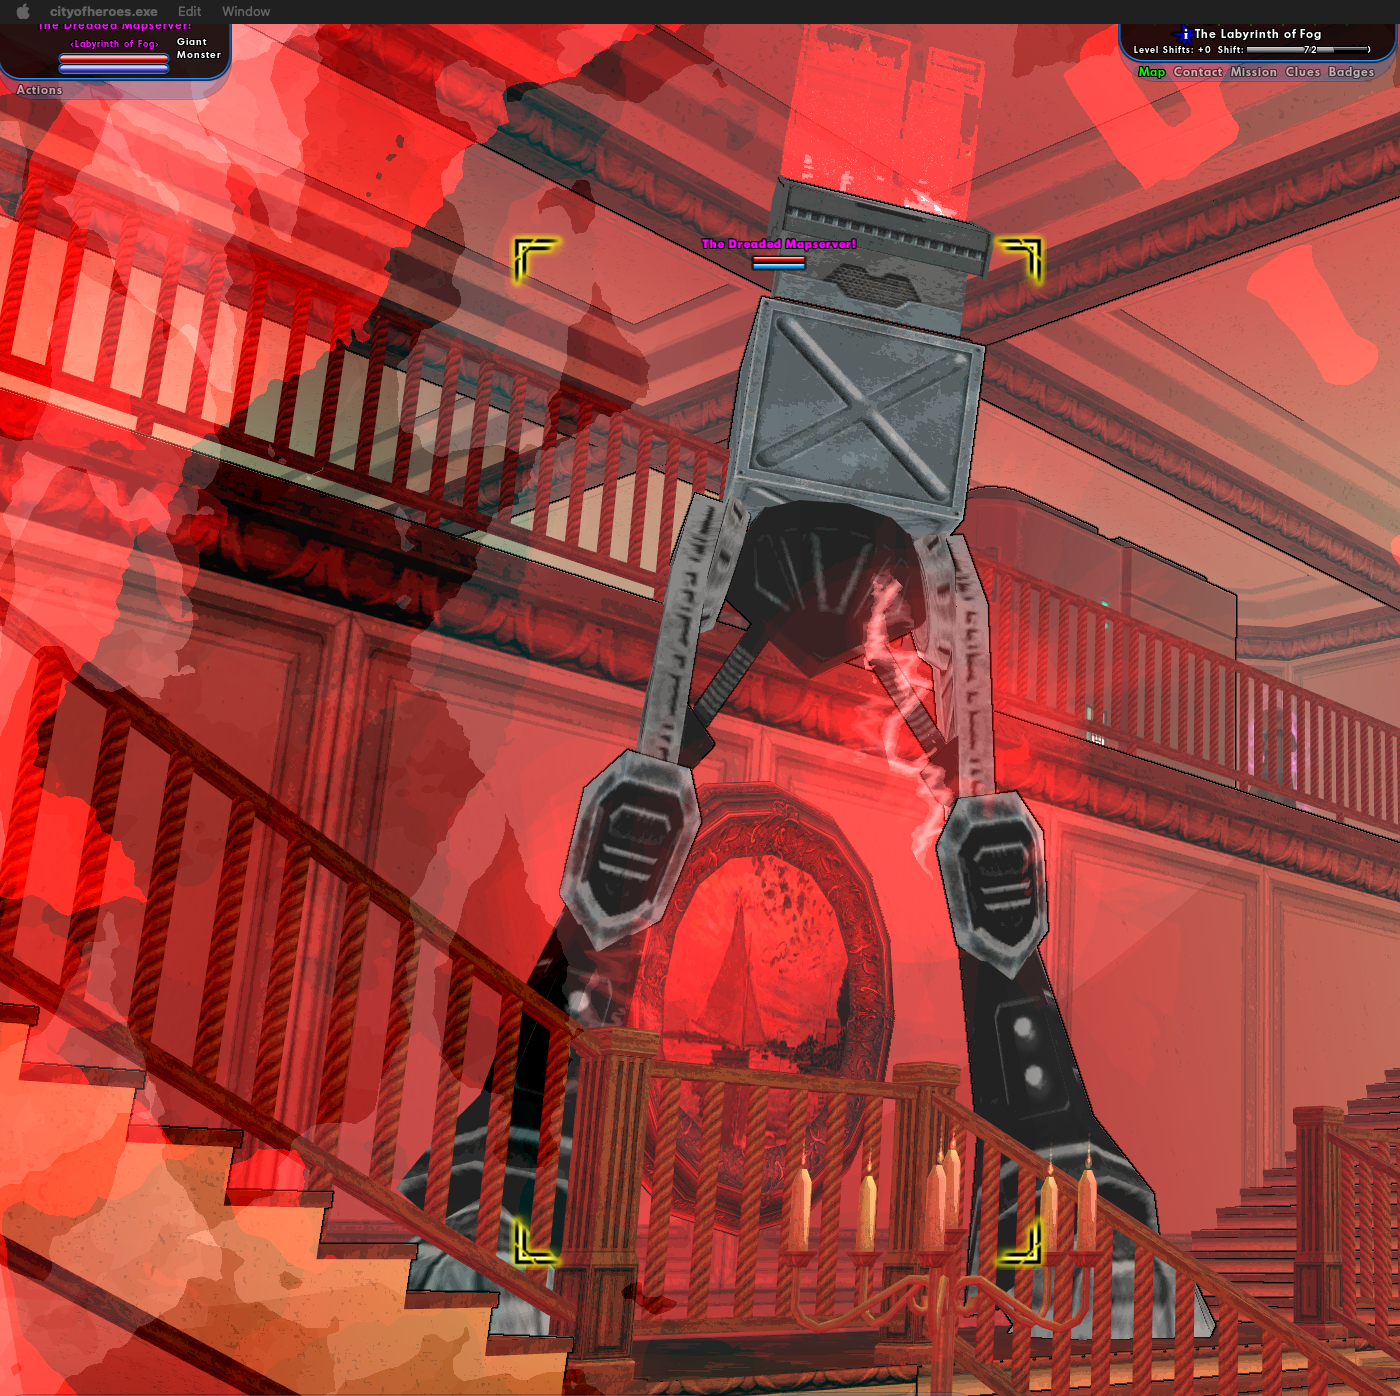 This is taking the aesthetic of a Daft Punk concert to a whole new level.
You can either click on one of the door you entered through to leave, or depart the tram toward your lab in the Black Mesa Ressearch Facility.